
Ana Sayfa Blog
Crochet Crocodile Free Amigurumi Pattern

Hello everyone who loves amigurumi…
Today I shared the amigurumi crocodile crochet pattern for you. Below you will find a step-by-step tutorial of this pattern and you will complete it without any difficulty. Thanks to the creator for this cute pattern.
Materials Needed
*Yarn: Worsted Weight #6, approximately 250g of main color and 100g of accent colors
Color A: Dark Green, Color B: Light Green
*Hook Size: F hook or 3.75 mm
*23 x 28 mm oval safety eyes
*Scissors
*Sewing needle
*Stitch marker
*Fiberfill stuffing
Abbreviations
mr= magic ring- crochet single crochet stitches in to the adjustable loop
BLO= back loops only
ch= chain stitch
F/O= Fasten off
sc= single crochet stitch
hdc= half double crochet
sl= slip stitch
FLO= front loops only
tr= triple crochet
dc= double crochet stitch
inc3= 3 sc in the same stitch bob= bobble stitch
inc= increase- make two single crochet stitches in the same stitch
dec=decrease- crochet two stitches together using the decrease method
(4 sc, inc) x 6= repeat the pattern between parentheses 6 times
SNAP THE CROCODILE CROCHET FREE PATTERN
Head
Crocheted from top of head to bottom of tail
With Color A:
Ch 5
1. inc in 2nd ch from hook, 2 sc, inc3 in last chain, working on the opposite side of the chain: 3 sc, inc= 12
2. (sc, inc) x 6= 18
3. (2 sc, inc) x 6= 24
4. (3 sc, inc) x 6= 30
5. (4 sc, bob) x 2, 20 sc= 30
6. sc in each st around
Stuff the head and body as you work
7. (dec, 13 sc) x 2= 28
8. (dec, 12 sc) x 2= 26
9. (dec, 11 sc) x 2= 24
10-11. sc in each st around
12. (inc, 11 sc) x 2= 26
13-14. sc in each st around
15. (inc, 12 sc) x 2= 28
16-17. sc in each st around
18. (inc, 13 sc) x 2= 30
19. sc in each st around
20. (4 sc, inc) x 6= 36
21. (5 sc, inc) x 6= 42
22. (6 sc, inc) x 6= 48
Place eyes between rounds 19 and 20, leaving 9 holes between them. 1st eye is placed before the 2nd increase. Count 9 holes after the first eye and place the 2nd eye. (Make sure you line the eyes up with the nostrils on round 5) If you want the sunken eye look, do not place the backs of the eyes on until round 33.
TIP! You may have to adjust the eye placement depending on yarn and hook size you use.
23-26. sc in each st around
27. (6 sc, dec) x 6= 42
28-29. sc in each st around
30. (5 sc, dec) x 6= 36
Now for the eyes. Stuff the head well. Cut a long piece of yarn and remove the eyes. Place the needle in the hole where the first eye was and thread the needle into a hole next to the eye hole. Go back and forth between each eye hole repeating the process from the first eye. Pull slightly on the yarn after going through each hole. Do this about 3 times on each side until you reach the look you want. To place the backs of the eyes you will need to remove most of the stuffing to place the washers on the eyes then re stuff it.
Head and Body
31-34. sc in each st around
35. (11 sc, inc) x 3= 39
36. sc in each st around
37. (12 sc, inc) x 3= 42
38. sc in each st around
39. (13 sc, inc) x 3= 45
40. sc in each st around
41. (14 sc, inc) x 3= 48
42-47. sc in each st around
48. (dec, 14 sc) x 3= 45
49-50. sc in each st around
51. (dec, 13 sc) x 3= 42
52-53. sc in each st around
54. (dec, 12 sc) x 3= 39
55-56. sc in each st around
57. (dec, 11 sc) x 3= 36
58-59. sc in each st around
60. (dec, 10 sc) x 3= 33
61. (dec, 9 sc) x 3= 30
62-67. sc in each st around
68. (3 sc, dec) x 6= 24
69-73. sc in each st around
74. (2 sc, dec) x 6= 18
75-79. sc in each st around
80. (sc, dec) x 6= 12
81-85. sc in each st around
86. (2 sc, dec) x 3= 9
87. sc in each st around
88. (sc, dec) x 3= 6
F/O and sew the hole closed
Belly
With Color B:
Ch 9
1. sc in 2nd ch from hook and across= 8
2. Ch 1, turn, inc, 6 sc, inc= 10
3. Ch 1, turn, inc, 8 sc, inc= 12
4. Ch 1, turn, sc in each st across
5. Ch 1, turn, dec, 8 sc, dec= 10
6. Ch 1, turn, dec, 6 sc, dec= 8
7-20. Ch 1, turn, sc in each st across
21. Ch 1, turn, inc, 6 sc, inc= 10
22. Ch 1, turn, inc, 8 sc, inc= 12
23-25. Ch 1, turn, sc in each st across
26. Ch 1, turn, inc, 10 sc, inc= 14
27. Ch 1, turn, inc, 12 sc, inc= 16
28-30. Ch 1, turn, sc in each st across
31. Ch 1, turn, dec, 12 sc, dec= 14
32. Ch 1, turn, sc in each st across
33. Ch 1, turn, dec, 10 sc, dec= 12
34. Ch 1, turn, sc in each st across
35. Ch 1, turn, dec, 8 sc, dec= 10
36-39. Ch 1, turn, sc in each st across
40. Ch 1, turn, inc, 8 sc, inc= 12
41. Ch 1, turn, sc in each st across
42. Ch 1, turn, inc, 10 sc, inc= 14
43. Ch 1, turn, inc, 12 sc, inc= 16
44. Ch 1, turn, sc in each st across
45. Ch 1, turn, inc, 14 sc, inc= 18
46. Ch 1, turn, inc, 16 sc, inc= 20
47-52. Ch 1, turn, sc in each st across
53. Ch 1, turn, dec, 16 sc, dec= 18
54. Ch 1, turn, dec, 14 sc, dec= 16
55-56. Ch 1, turn, sc in each st across
57. Ch 1, turn, dec, 12 sc, dec= 14
58-59. Ch 1, turn, sc in each st across
60. Ch 1, turn, dec, 10 sc, dec= 12
61-63. Ch 1, turn, sc in each st across
64. Ch 1, turn, dec, 8 sc, dec= 10
65-68. Ch 1, turn, sc in each st across
69. Ch 1, turn, dec, 6 sc, dec= 8
Legs(Make 4)
With Color A
1. Make 8 sc into a magic ring= 8
2. Increase in each st around= 16
3. (sc, inc) x 8= 24
4. sc, (ch 5, sc in 2nd ch from hook, hdc in next ch, dc in next ch, tr in next ch, skip next st on leg, sc in next st) x 4, 15 sc
5. sc in each st around (you are crocheting in the skipped stitches of the previous round, stitch 2, 4, 6, 8)
6. (dec, 10 sc) x 2= 22 Start stuffing the legs
7. (dec, 9 sc) x 2= 20
8. (dec, 8 sc) x 2= 18 Stop stuffing the legs
9. (dec, 7 sc) x 2= 16
10. (dec, 6 sc) x 2= 14
11. (dec, 5 sc) x 2= 12
12. sc in each st around Fold the legs in half and sc the opening closed.
F/O and leave a long tail for sewing
Assembly
Belly
1. Turn the body upside down and pin the belly onto it.
2. Sew the belly onto the body.
Legs
1. Pin the legs onto the side of the body above the belly.
2. Sew the legs onto the body
Spikes
1. You can do the spikes one of many ways but here are two different ways.
You can surface stitch the spikes. Mark two lines with pins going from the tip of the tail to in between rounds 30 and 31.
Attach the yarn with a sl st starting at the tip of the tail and work 3 hdc into a stitch. Sl st in next 3 stitches. Repeat down the back.
Or….
You can make a chain. Lay it against the back of the body to know exactly how many chains you will need. Work 3 hdc in 2nd ch from hook, sl st in next 3 chains. Repeat down the chain. Sew the chain onto the body.
Amigurumi bus crochet pattern
")

 Bus: The bus is crocheted from the bottom up. Row 1 70 ch join into a ring with a sl st – be careful not to twist the row. Rows 2-8 Start with yellow yarn. 1 sc in each ch = 70 sc Row 9 70 sc with white yarn Row 10 – 13 70 sc with gray yarn Row 14 70 sc with white yarn Row 15 70 sc with yellow yarn Place markers at the corners of the bus like this: marker in the 10th sc marker in the 35th sc marker in the 45th sc marker in the 70th scRoof Crochet in the top row on one of the long sides: Row 1 25 sc. On this row, crochet only in the back loop of the sc. Row 2-10 25 scBottom Crochet in the bottom row on one of the long sides: Rows 1 -10 25 sc.Window and door posts are now distributed as you wish, but make sure there is a window post in each corner. Use the markers to see where they are. Window posts: Make white window posts this way: Start with a ch behind a sc on the top white row of sc.Crochet 5 ch
-
-
Attach the post to the bottom row of white sc with a ch in the sc vertically below the sc the post started in.Doorposts Start with a window post. Then make 6 more ch and finish with a ch in the sc in the last row vertically below the sc that the post started in.
-
-
Wheels (4 pcs) Row 1 ch 3, join into a ring. Row 2 8 sc in the ring with gray yarn. Row 3 Change to black yarn. 2 sc in each sc = 16 sc Assembly Use the markers in the corners to sew the roof and bottom together evenly on the bus. I sewed together from the right side to get the most angular look. Stuff the filling before sewing it all together. Embroider door handle on the door Sew the wheels o
Amigurumi Snake Crochet Free Pattern

Hello everyone who loves amigurumi…
Today I shared the amigurumi snake crochet pattern for you. Below you will find a step-by-step tutorial of this pattern and you will complete it without any difficulty. Thanks to the creator for this cute pattern.

Materials
• Himalaya Dolphin Baby or YarnArt Dolce yarn
• The eyes on the secure mount are 12 mm for a large snake, and 9 mm for a small one
• 4.5 mm hook
• Holofiber
AMIGURUMI PLUSH SNAKE FREE PATTERN
A Head For a Big Snake
Rnd 1. 6 sc in MR
Rnd 2. (sc, inc) x 3 (9)
Rnd 3. (2 sc, inc) x 3 (12)
Rnd 4. (5 sc, inc) x 2 (14)
Rnd 5. (6 sc, inc) x 2 (16)
Rnd 6. (7 sc, inc) x 2 (18)
Rnd 7. (8 sc, inc) x 2 (20)
Rnd 8. (9 sc, inc) x 2 (22)
Insert the eyes above the increments, at a distance of 6 sc
Rnd 9. (10 sc, inc) x 2 (24)
Rnd 10. (10 sc, dec) x 2 (22)
Rnd 11. (4 sc, dec) x 3, 2 sc, dec (18)
Rnd 12. (7 sc, dec) x 2 (16)
Rnd 13. (6 sc, dec) x 2 (14)
Backloop crochet
Rnd 14. 14 sc
Then we usually knit 14 cm or the desired length.
Fill it weakly so that the snake folds in half
Tail
Rnd 1. (5 sc, dec) x 2 (13)
Rnd 2. 12 sc
Rnd 3. 12 sc
Rnd 4. (2 sc, dec) x 3 (9)
Rnd 5. 9 sc
Rnd 6. (1 sc, dec) x 3 (6)
Rnd 7. 6 sc
Rnd 8. 3 dec before closing. Finish knitting, hide the thread.
A Head Fod a Small Snake
Rnd 1. 6 sc in MR
Rnd 2. (sc, inc) x 3 (9)
Rnd 3. (2 sc, inc) x 3 (12)
Rnd 4. (5 sc, inc) x 2 (14)
Rnd 5. (6 sc, inc) x 2 (16)
Rnd 6. (7 sc, inc) x 2 (18)
Insert the eyes above the increments, at a distance of 5 sc
Rnd 7. (7 sc, dec) x 2 (16)
Rnd 8. (6 sc, dec) x 2 (14)
Rnd 9. (5 sc, dec) x 2 (12)
Rnd 10. (2 sc, dec) x 3 (9)
Backloop crochet
Rnd 11. 9 sc
Next, we usually knit 9 cm or the desired length.
Fill it weakly so that the snake folds in half
Tail
Rnd 1. (1 sc, dec) x 3 (6)
Rnd 2. 6 sc
Rnd 3. 6 sc
Rnd 4. 3 dec before closing. Finish knitting hide the thread.
Finished.
Free Amigurumi Kangaroo Pattern – Crochet Your Own Cute Kangaroo!

Terms and Abbreviations:
SC – Single Crochet
INC – Increase (2 SC in one stitch)
DEC – Decrease (SC 2 together)
SS – Slip Stitch
Amigurumi Ring
PATTERN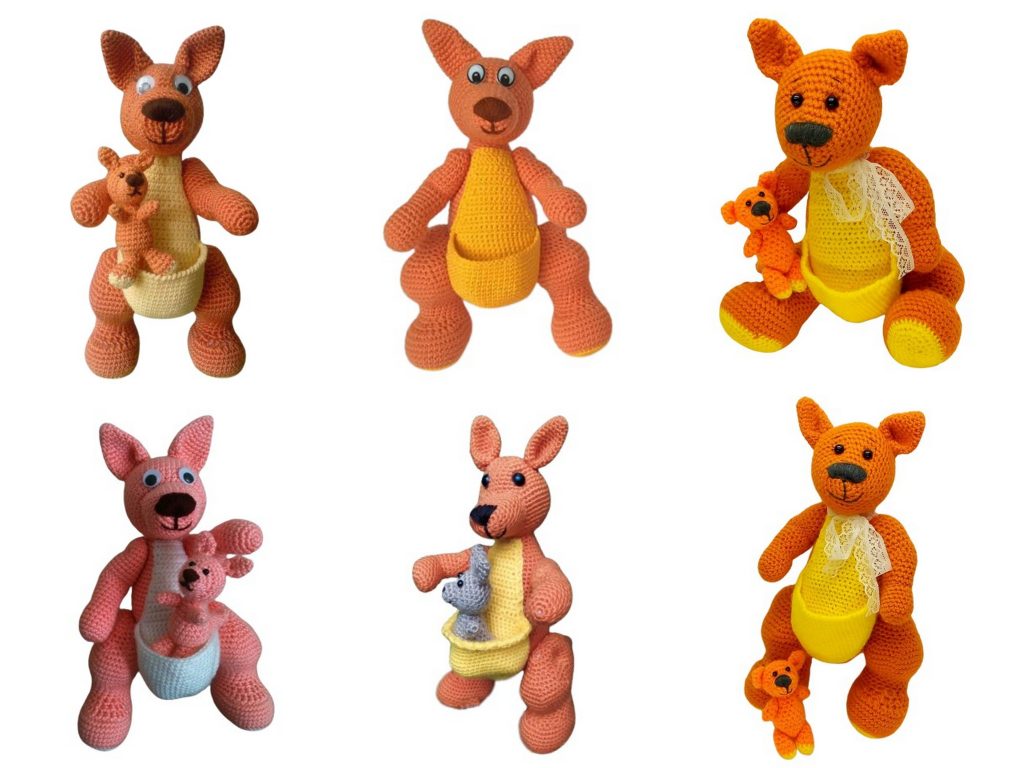
Mama Kangaroo
Head
Crochet with brown yarn.
Round 1: 6 SC into the amigurumi ring.
Round 2: INC in each stitch around. (12)
Round 3: (1 SC, INC) – repeat 6 times. (18)
Round 4: (2 SC, INC) – repeat 6 times. (24)
Round 5: (3 SC, INC) – repeat 6 times. (30)
Round 6: 30 SC
Round 7: (4 SC, INC) – repeat 6 times. (36)
Round 8: (5 SC, INC) – repeat 6 times. (42)
Round 9: 42 SC
Round 10: (6 SC, INC) – repeat 6 times. (48)
Rounds 11-16: 48 SC
Round 17: (6 SC, DEC) – repeat 6 times. (42)
Round 18: (5 SC, DEC) – repeat 6 times. (36)
Round 19: 36 SC
Round 20: (4 SC, DEC) – repeat 6 times. (30)
Round 21: 30 SC
Round 22: (3 SC, DEC) – repeat 6 times. (24)
Round 23: (2 SC, DEC) – repeat 6 times. (18)
Stuff the part.
Round 24: (1 SC, DEC) – repeat 6 times. (12)
Round 25: DEC – repeat 6 times. (6)
Fasten off, cut the yarn, and hide the tail inside the part.
Snout
Crochet with brown yarn.
Round 1: 6 SC into the amigurumi ring.
Round 2: (1 SC, 3 SC in one stitch) – repeat 3 times. (12)
Round 3: (3 SC, 3 SC in one stitch) – repeat 3 times. (18)
Round 4: (5 SC, 3 SC in one stitch) – repeat 3 times. (24)
Round 5: (5 SC, DEC, INC) – repeat 3 times. (24)
Rounds 6-7: 24 SC
Round 8: (7 SC, 3 SC in one stitch) – repeat 3 times. (30)
Rounds 9-11: 30 SC
Fasten off, leave a long yarn end for sewing.
Attach the snout, making sure one of the snout’s points (which started as a triangle) is facing downward, and the other two points are on the upper part of the head.
Facial Details
Create a slight indentation in the eye area.
Embroider the nose and mouth on the protruding part of the snout to form a smile.
Attach eyelashes to the eyes (from the back), and glue the eyes onto the head in the indented areas.
Ears (Make 2)
Crochet with brown yarn.
Round 1: 6 SC into the amigurumi ring.
Round 2: (1 SC, INC) – repeat 3 times. (9)
Round 3: 9 SC
Round 4: (2 SC, INC) – repeat 3 times. (12)
Round 5: 12 SC
Round 6: (INC, 5 SC) – repeat 2 times. (14)
Round 7: (INC, 6 SC) – repeat 2 times. (16)
Round 8: (INC, 7 SC) – repeat 2 times. (18)
Round 9: (INC, 8 SC) – repeat 2 times. (20)
Round 10: INC, 19 SC. (21)
Round 11: INC, 20 SC. (22)
Round 12: INC, 21 SC. (23)
Round 13: INC, 22 SC. (24)
Do not stuff the ear. Fasten off, leave a long yarn end for sewing.
One side of the ear has a slight increase, and these sides should face each other. Bend the elongated end and secure it with a stitch. Attach the ears to the head.
Body
Crochet with brown yarn.
Round 1: 6 SC into the amigurumi ring.
Round 2: INC in each stitch around. (12)
Round 3: (1 SC, INC) – repeat 6 times. (18)
Round 4: (2 SC, INC) – repeat 6 times. (24)
Round 5: (3 SC, INC) – repeat 6 times. (30)
Round 6: (4 SC, INC) – repeat 6 times. (36)
Round 7: (5 SC, INC) – repeat 6 times. (42)
Round 8: (6 SC, INC) – repeat 6 times. (48)
Round 9: 7 SC, INC, (3 SC, INC) – repeat 4 times, 7 SC, INC, (3 SC, INC) – repeat 3 times. (56)
Round 10: 12 SC, INC, 10 SC, INC, 32 SC. (58)
Rounds 11-13: 58 SC
Round 14: 38 SC, DEC, (7 SC, DEC) – repeat 2 times. (55)
Rounds 15-16: 55 SC
Round 17: 38 SC, DEC, (6 SC, DEC) – repeat 2 times. (52)
Rounds 18-20: 52 SC
Round 21: 36 SC, DEC, (5 SC, DEC) – repeat 2 times. (49)
Rounds 22-24: 49 SC
Round 25: (10 SC, DEC) – repeat 2 times, 25 SC. (47)
Round 26: 4 SC, DEC, (8 SC, DEC) – repeat 2 times, 21 SC. (44)
Round 27: 44 SC
Round 28: (8 SC, DEC) – repeat 2 times, 24 SC. (42)
Rounds 29-30: 42 SC
Round 31: (5 SC, DEC) – repeat 6 times. (36)
Rounds 32-34: 36 SC
Round 35: (4 SC, DEC) – repeat 6 times. (30)
Round 36: 30 SC
Round 37: (3 SC, DEC) – repeat 3 times, 15 SC. (27)
Round 38: 3 SC, DEC, (2 SC, DEC) – repeat 2 times, 14 SC. (24)
Rounds 39-40: 24 SC
Stuff the body. Fasten off, leave a long yarn end for sewing.
Attach the body to the head.
Belly with a Pouch
Crochet with yellow yarn.
Round 1: 6 SC into the amigurumi ring.
Round 2: INC in each stitch around. (12)
Round 3: (1 SC, INC) – repeat 6 times. (18)
Round 4: (2 SC, INC) – repeat 6 times. (24)
Round 5: (3 SC, INC) – repeat 6 times. (30)
Round 6: (4 SC, INC) – repeat 6 times. (36)
Round 7: (5 SC, INC) – repeat 6 times. (42)
Round 8: (6 SC, INC) – repeat 6 times. (48)
Round 9: (7 SC, INC) – repeat 6 times. (54)
Round 10: (8 SC, INC) – repeat 6 times. (60)
Round 11: (INC, 9 SC) – 3 times, INC, 29 SC. (64)
Rounds 12-13: 64 SC
Round 14: (8 SC, DEC) – 2 times, 44 SC. (62)
Rounds 15-16: 62 SC
Round 17: (7 SC, DEC) – 3 times, 35 SC. (59)
Round 18: 59 SC
Round 19: DEC, 20 SC, DEC, 35 SC. (57)
Round 20: 57 SC
Round 21: DEC, 18 SC, DEC, 35 SC. (55)
Round 22: DEC, 16 SC, DEC, SS, CH, turn, and continue in straight rows (back and forth).
Round 23: Skip the SS and starting from the next stitch: DEC, 14 SC, DEC, SS, CH, turn.
Round 24: Skip the SS and starting from the next stitch: 16 SC, CH, turn.
Round 25: 16 SC, CH, turn.
Round 26: DEC, 12 SC, DEC, CH, turn.
Rounds 27-28: 14 SC, CH, turn.
Round 29: DEC, 10 SC, DEC, CH, turn.
Rounds 30-31: 12 SC, CH, turn.
Round 32: DEC, 8 SC, DEC, CH, turn.
Rounds 33-34: 10 SC, CH, turn.
Round 35: DEC, 6 SC, DEC, CH, turn.
Rounds 36-38: 8 SC, CH, turn.
Round 39: 3 SC, DEC, 3 SC. (7)
Round 40: 7 SC.
Edge of the piece, then single crochet along the front side in a crab stitch.
Sew the belly to the body, with the protruding part of the body facing the rear (it will be where the tail is attached).
Attach the head, slightly tilting it forward.
Upper Legs (Make 2)
Crochet with brown yarn.
Round 1: 6 SC into the amigurumi ring.
Round 2: INC in each stitch around. (12)
Round 3: (1 SC, INC) – repeat 6 times. (18)
Rounds 4-8: 18 SC
Round 9: (4 SC, DEC) – repeat 3 times. (15)
Rounds 10-11: 8 SS, 7 SC. (15)
Rounds 12-14: 15 SC
Round 15: (4 SC, INC) – repeat 3 times. (18)
Change to a brown thread. Start the row on the side of the oval.
Round 6: 44 SC through the back loop (only this round).
Rounds 7-11: 44 SC
Round 12: DEC in the PS, 11 times, 6 SC, DEC, 5 times, 6 SC. (28)
Round 13: (DEC in the PS, 1 PS) – 3 times, DEC in the PS, 17 SC. (24)
Round 14: (1 PS, DEC in the PS) – 2 times, 1 PS, 17 SC. (22)
Rounds 15-17: 22 SC
Round 18: 3 SC, INC, 2 SC, INC, 15 SC. (24)
Round 19: INC, 3 SC, INC, 2 SC, INC, 3 SC, INC, 12 SC. (28)
Round 20: (INC, 4 SC) – 3 times, INC, 12 SC. (32)
Round 21: INC, 5 SC, INC, 6 SC, INC, 5 SC, INC, 12 SC. (36)
Round 22: INC, 7 SC, INC, 6 SC, INC, 7 SC, INC, 12 SC. (40)
Round 23: 28 SC, (1 SC, INC) – 6 times. (46)
Round 24: DEC, 7 SC, DEC, 6 SC, DEC, 7 SC, DEC, 18 SC. (42)
Round 25: DEC, 5 SC, DEC, 6 SC, DEC, 5 SC, DEC, 1 SC, (INC, 2 SC) – 5 times, INC, 1 SC. (44)
Round 26: (DEC, 4 SC) – 3 times, DEC, 24 SC. (40)
Round 27: DEC, 3 SC, DEC, 2 SC, DEC, 3 SC, DEC, 24 SC. (36)
Round 28: (DEC, 1 SC) – 3 times, DEC, 25 SC. (32)
Round 29: 1 SC, DEC, 2 SC, DEC, 25 SC. (30)
Round 30: 30 SC
Round 31: (3 SC, DEC) – 6 times. (24)
Round 32: (1 SC, DEC) – 8 times. (16)
Round 33: DEC – 8 times. (8)
Pull the stitches together, fasten off the yarn, and hide the end inside the piece.
Note that the legs have two bends.
Lower Legs (Make 2)
Start with yellow yarn, without a starting loop, crocheting an oval around a chain.
Chain 7.
Round 1: 3 SC in the second chain from the hook, 4 SC in the next chains, 3 SC in the last chain. Turn and crochet 4 SC on the other side of the chain. (14)
Round 2: INC – 3 times, 4 SC, INC – 3 times, 4 SC. (20)
Round 3: (INC, 1 SC) – 3 times, 4 SC, (INC, 1 SC) – 3 times, 4 SC. (26)
Round 4: (1 SC, INC) – 4 times, 5 SC, (1 SC, INC) – 4 times, 5 SC. (34)
You should have a nice oval shape. Change to brown yarn, starting from the side of the oval.
Round 6: 44 SC through the back loop (only this round).
Rounds 7-11: 44 SC
Round 12: DEC in the SS – 11 times, 6 SC, DEC – 5 times, 6 SC. (28) Make the decreases tight to prevent holes.
Round 13: (DEC in the SS, 1 SS) – 3 times, DEC in the SS, 17 SC. (24)
Round 14: (1 SS, DEC in the SS) – 2 times, 1 SS, 17 SC. (22)
Fasten off.
Baby Kangaroo
Head
Crochet with brown yarn.
Round 1: 6 SC into the amigurumi ring.
Round 2: INC in each stitch around. (12)
Rounds 3-4: 12 SC
Round 5: 6 SS, 6 SC. (12)
Round 6: INC in each stitch around, working 2 SC in each stitch. (24)
Rounds 7-9: 24 SC
Round 10: (2 SC, DEC) – 6 times. (18) Stuff the piece.
Round 11: 18 SC
Round 12: (1 SC, DEC) – 6 times. (12)
Round 13: DEC – 6 times. (6)
Pull the stitches together, cut the yarn, fasten off, and hide the yarn tail inside the piece.
Ears (Make 2)
Crochet with brown yarn.
Round 1: 4 SC into the amigurumi ring.
Round 2: (1 SC, INC) – 2 times. (6)
Round 3: (2 SC, INC) – 2 times. (8)
Rounds 4-5: 8 SC
Don’t stuff the piece. Fold it in half and slip stitch through the stitches, then fasten off, leaving a short yarn tail for sewing.
Body
Crochet with brown yarn.
Round 1: 6 SC into the amigurumi ring.
Round 2: INC in each stitch around. (12)
Round 3: (1 SC, INC) – 6 times. (18)
Round 4: INC, 2 SC, INC, 1 SC, INC, 2 SC, INC, 9 SC. (22)
Rounds 5-6: 22 SC
Round 7: 8 SC, (DEC, 2 SC) – 3 times, DEC. (18)
Round 8: 18 SC
Round 9: 8 SC, (DEC, 2 SC) – 2 times, DEC. (15)
Round 10: 15 SC
Round 11: (3 SC, DEC) – 3 times. (12)
Round 12: 12 SC
Round 13: (DEC, 1 SC) – 4 times. (8) Stuff the piece.
Don’t pull the stitches too tightly, secure the yarn, and leave a long yarn tail for sewing.
Tail
Crochet with brown yarn.
Round 1: 6 SC into the amigurumi ring.
Round 2: (1 SC, INC) – 3 times. (9)
Round 3: 9 SC
Round 4: (2 SC, INC) – 3 times. (12)
Rounds 5-7: 12 SC
Round 8: (3 SC, INC) – 3 times. (15)
Rounds 9-11: 15 SC
Round 12: (4 SC, INC) – 3 times. (18)
Rounds 13-16: 18 SC
Round 17: 6 SC, (2 SC, INC) – 4 times. (22)
Round 18: 2 SC, (3 SC, INC) – 5 times. (27)
Round 19: 27 SC
Round 20: 6 SC, (INC, 9 SC) – 2 times, INC. (30)
Round 21: 30 SC
Round 22: 7 SC, (INC, 10 SC) – 2 times, INC. (33)
Round 23: 33 SC
Round 24: 7 SC, (INC, 4 SC) – 5 times, INC. (39)
Rounds 25-26: 39 SC
Stuff the piece. Do not pull the stitches too tightly. Secure the yarn and leave a long yarn tail for sewing.
Assemble the kangaroo as follows:
Sew the upper legs to the body, leaving the bottom part unsewn to create a pouch for the baby kangaroo.
Attach the head to the body.
Sew the tail to the back of the kangaroo so that it can lean on it.
Assemble the baby kangaroo by sewing its head to its body, making sure to stuff it.
Attach the ears to the baby kangaroo, folding them slightly at the bottom before sewing.
Sew the upper legs and the tail to the baby kangaroo.
Embroider the baby kangaroo’s nose with black yarn and attach beads or safety eyes for the eyes.
Your baby kangaroo is now complete and can even stand on its own. Enjoy your crocheting!
Crochet Rooster Amigurumi Free Pattern

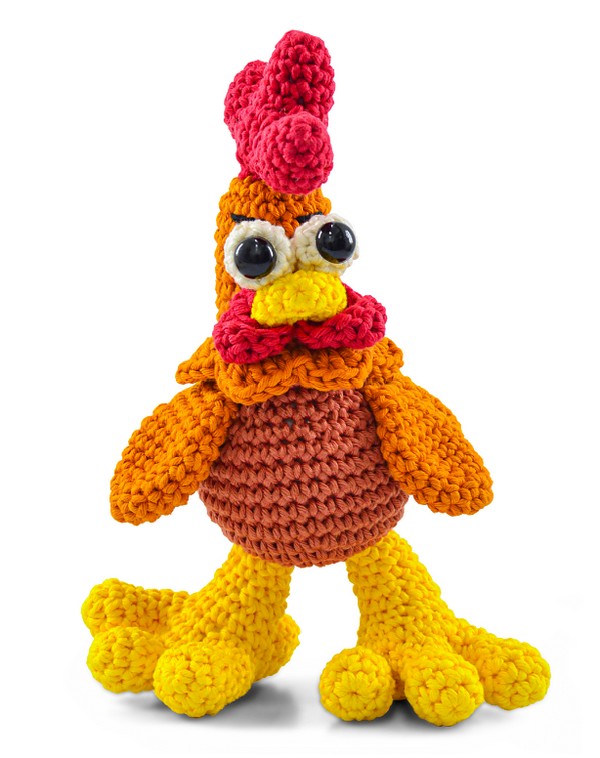
Making The Crochet Rooster Amigurumi
Materials
- Amigurumi Maxi yarn – 1 ball in each color:
- #3528
- #4131
- #4095
- #1289
- #8001
- Black yarn scraps
- Crochet hook size E-4
- Polyester stuffing
- Black safety eyes, 16 mm
Stitch Glossary and Abbreviations
- st – stitch
- mk – make
- sk – skip
- ch – chain
- sl st – slip stitch
- sc – single crochet
- dc – double crochet
- inc – increase
- dec – decrease
- rnd – round
- eor – end of row/rnd
- BLO – back loop only
- FLO – front loop only
- Shell st – (3 dc, ch 2, 3 dc) in the same base st
- Invisible fasten off – To invisibly finish a piece
Crochet Garfield Amigurumi Pattern With Video Tutorial

Engage yourself in the world of craft with this crochet Garfield amigurumi pattern. Designed to capture the essence of the beloved, lasagna-loving cat from the celebrated comic strip, every stitch helps bring Garfield to life. This pattern accurately recreates his vibrant orange fur, detailed with black stripes, large expressive eyes, and his characteristic cheeky smile. It’s a perfect project for Garfield fans and amigurumi enthusiasts seeking a delightful and engaging crafting experience.

Materials Required:
- Granny yarn
- 2.75 mm crochet hook
- Safety eyes or pointed eyes for felting dolls
- Stuffing material
- Needle for sewing
- Black yarn for details
- Silicone glue (optional)
Abbreviations:
- st(s): stitch(es)
- ch: chain
- sl st: slip stitch
- inc: increase
- dec: decrease
- hdc: half double crochet

-
Step By Step Pattern
Pattern:
Arms (Make 2):
- Start with a magic ring of 8 sts. Close with a sl st.
- Round 2: 3 sts, inc repeat twice (10 sts).
- Rounds 3-4: 10 sts without increases or decreases.
- Round 5: 2 sts, then in the next st crochet 3 hdc together, chain to close, then 7 sts.
- Round 6: Dec by skipping 2 sts, then 5 sts (7 sts).
- Rounds 7-10: Knit without increases or decreases (7 sts).
- Fill the hand slightly, leave the arm unfilled. Cut a long thread to sew later
-
Legs (Make 2):
- Start with 6 chs. Starting from the second ch from the hook, make an inc, then 3 sts.
- In the last stitch, 4 sts together. Continue with 2 sts, then another inc.
- Rounds 2 – 8: Follow the instructions for creating the shape of the foot, including decreases and finishing with 8 sts.
Head and Body:
- Begin with a magic ring of 8 sts. Increase in each round as instructed until you create the head’s spherical shape, then transition smoothly into the body’s form, decreasing stitches towards the lower body.

Ears (Make 2):
- Start with a magic ring of 8 sts. Follow the pattern for increases and shaping the ears, ending each with 12 sts.
Tail:
- Follow the detailed instructions to crochet the tail, starting with a magic ring and increasing stitches per round, then filling only the tip and closing with a needle.
Details and Assembly:
- Eyes: Position between rounds 18 and 28, using safety or felting eyes.
- Mustache and Nose: Attach using silicone glue or sew in place.
- Embroidery: For the toes, tail stripes, and facial details, use black yarn to embroider according to the pattern’s instructions.
- Assembly: Sew all parts together as indicated, attaching limbs at the specified rounds for correct positioning.

Finishing Touches:
- After assembling the parts, position and sew/glue the eyes, nose, and any additional decorations.
- Fill the body and parts with stuffing material as instructed during the crochet process to achieve the desired shape and firmness.
- Use the needle and yarn to close open parts and secure all attachments firmly.
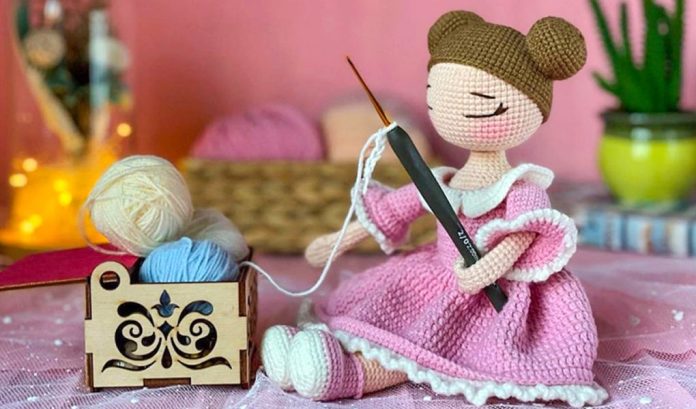
Amigurumi Free Yuko Doll Crochet Pattern Tutorial

Hello amigurumi lovers and beautiful visitors, I wanted to share free amigurumi models with you here. In my article, I will share with you a model and how to make it. At the end of my article, I will share with you the detailed construction patterns of the mold.
Abbreviations
MR: Magic ring
Sc: Single crochet
Ch: Chain
Slst: Slip stitch
St: Stitch
Hdc: Half double crochet
Dc: Double crochet
Inc-dc: Double crochet increase
FLO: Front loop only
BLO: Back loop only
Dec: Decrease
Inc: Increase
Materials
• Hook size: 2mm
• Fiberfill
• Scissors
• Sewing pins
• Needle for sewing pieces
• Black or brown thread for embroidery
• Pink blush
• Yarn (ı used Yarnart jeans)
• Pink blush makeup powder
Head
Begin crocheting with skin color yarn.
Rnd 1. 6 sc in MR
Rnd 2. 6 inc (12)
Rnd 3. (1sc,inc)*6 (18)
Rnd 4. (2sc,inc)*6 (24)
Rnd 5. (3sc,inc)*6 (30)
Rnd 6. (4sc,inc)*6 (36)
Rnd 7. (5sc,inc)*6 (42)
Rnd 8. (6sc,inc)*6 (48)
Rnd 9. (7sc,inc)*6 (54)
Rnd 10. (8sc,inc)*6 (60)
Rnd 11-23. 60 sc (13 rnds)
Rnd 24. (8sc,dec)*6 (54)
Rnd 25. (7sc,dec)*6 (48)
Rnd 26. (6sc,dec)*6 (42)
Rnd 27. (5sc,dec)*6 (36)
Rnd 28. (4sc,dec)*6 (30)
Rnd 29. (3sc,dec)*6 (24)
Rnd 30. (2sc,dec)*6 (18)
Slst, finish crocheting cut the yarn and hide the thread.
Stuffing the head, sew the eyes between 18 and 19 rnd, the space between eyes is 7 stitches. (the length of each eyes is 5 stitches).
Sew the brows between 14 rnd and 15 rnd, the space between brows is 9 stitches, (the lenght of each brows is 4 stitches).
Bun (Make 2)
Rnd 1. 6 sc in MR
Rnd 2. 6 inc (12)
Rnd 3. (1sc,inc)*6 (18)
Rnd 4. (2sc,inc)*6 (24)
Rnd 5. (3sc,inc)*6 (30)
Rnd 6. (4sc,inc)*6 (36)
Rnd 7-10. 36 sc (4 rnds)
Rnd 11. (4sc,dec)*6 (30)
Rnd 12. (3sc,dec)*6 (24)
Slst, stuff the bun, leave a long tail for sewing. Thank you for visiting our website amigurumireceitas.com.
Make two buns, sew them to the head, 7 rows distance the magic ring.
Arms (Make 2)
Rnd 1. 6 sc in MR
Rnd 2. 6 inc (12)
Rnd 3-4. 12 sc (2 rnds)
Rnd 5. (3sc,inc)*3 (15)
Rnd 6. 15 sc (15)
Rnd 7. (3sc,dec)*3 (12)
Rnd 8. (2sc,dec)*3 (9)
Rnd 9-31. 9 sc (23 rnds)
3 sc, fold and crochet 4 sc together leave a long tail for sewing.
Legs (Make 2)
Begin with white yarn.
Rnd 1. Ch 6, start to crochet on the second chain from the hook: 1 inc, 3 sc, 4 sc in the same stitch. On other side: 3 sc, 1 inc (14)
Rnd 2. 2 inc, 3 sc, 4 inc, 3 sc, 2 inc (22)
Rnd 3. (1sc,1inc)*2, 3sc, (1sc,inc)*4, 3 sc, (1sc,1inc)*2 (30)
Rnd 4. BLO: 30 sc (30)
Rnd 5. 30 sc (30)
Change to pink color yarn, cut the white yarn.
Rnd 6. 30 sc (30)
Rnd 7-8. 30 sc (2 rnds)
Rnd 9. BLO: 30 sc (30)
Rnd 10. 8sc, 7dec, 8sc (23)
Rnd 11. 8sc, 4dec, 7sc (19)
Rnd 12. 8sc, 2dec, 7sc (17)
Rnd 13. 17 sc (17)
Stuff it now.
Change to skin color yarn. Don’t cut the pink yarn, bring it to the outside.
Rnd 14. 17 sc (17)
Rnd 15-48. 17 sc (34 rnds)
Stuff the leg.
1 sc, fold the leg and crochet together: 8 sc. (pic. 13)
Cut the yarn. Go back to the pink color yarn that we left before, and crochet: 17 slst.
Cut the yarn and hide. (pic. 14-15.)
Body
Begin crocheting from the backside of the leg, attach white yarn with 1 ch, 16 sc through the front loops, 4 ch, take another leg and through the front loops: 16sc, 4sc through the chain stitches. (pic. 17-22)
Rnd 1. 7sc, 1inc, 20sc, 1 inc, 11 sc (42)
Rnd 2. 42 sc (42)
Rnd 3. 8 sc, 1 inc , 20 sc, 1 inc, 12 sc (44)
Rnd 4-5. 44 sc (2 rnds)
Rnd 6. 9 sc, 1 inc, 20 sc, 1 inc, 13 sc (46)
Rnd 7-8. 46 sc (2 rnds)
Rnd 9. 10 sc, change to skin color yarn, and 36 sc to the end of the round (46) (pic. 25)
Rnd 10-26. 46 sc (17 rnds)
Rnd 27. 11 sc, 2 dec, 19 sc, 2 dec, 8 sc (42)
Rnd 28. (4sc,dec)*7 (35)
Rnd 29. (3sc,dec)*7 (28)
Rnd 30. 28 sc (28)
Rnd 31. (2sc,dec)*7 (21)
Rnd 32. 21 sc (21)
Rnd 33. (4sc,dec)*3, 3sc (18)
Rnd 34-35. 18 sc (2 rnds)
Slst, leave a long tail.
Sew the head. Sew the arms to the body between 25 and 26 rounds. (pic. 28)
Dress
Best clothing retailers
Use (V- shapped single crochet) stitch technique for the dress.
Begin with pink color yarn.
45 chain.
Row 1. 44 sc
Row 2. 1 ch, 8 sc, 6 ch, skip 8 stitches, 12 sc, 6 ch, skip 8 stitches, 8 sc (40)
Start each row with 1 ch and turn
Row 3-13. 40 sc (11 rows)
Close in circle with slst, don’t turn the work, begin each round with 3 ch and finish with slst. (pic.30-33)
Rnd 1. inc-dc in each stitch to the end of the round
Rnd 2. 2 dc, (inc-dc, dc)* to the end of the round
Rnd 3-11. dc in each stitch to the end of the round (9 rnds)
Rnd 12. FLO: dc in each stitch to the end of the round
Cut the yarn and hide.
Attach white yarn to the back loops of the 11th round: 1 rnd- 2 rnd: 3 ch, dc in each stitch to the end of the round, slst. (pic. 34-36)
Rnd 3. (2ch,sc)* to the end of the round (pic. 37-39)
Best clothing retailers
Left sleeve
Attach pink color yarn to the second row (pic. 40)
Rnd 1. 1 ch, 16 sc (16)
Rnd 2-10. 16 sc (9 rnds)
Rnd 11. FLO: 16 sc (16)
Rnd 12. 16 inc-dc (32)
Rnd 13. 32 sc (32)
Rnd 14. 8 sc, change to the white color yarn: (2ch,sc)* around.
Right sleeve
Attach the yarn as the same way as we did before: to the second row.
Rnd 1. 1ch, 16 sc (16)
Rnd 2-10. 16 sc (9 rnds)
Rnd 11. FLO: 16 sc (16)
Rnd 12. 16 inc-dc (32)
Rnd 13. 32 sc (32)
Rnd 14. Change to the white color yarn: (2 ch, sc)* to the end of the round.
For buttons
With pink color yarn.
1sc, 7ch, 3sc, 7ch, 3sc, 7ch, 2sc
Sew the buttons.
Collar first part
Attach the white yarn to the back left side of dress.
Best clothing retailers
Row 1. 22 sc
Row 2. 3 ch turn, 1 dc, 7 inc-dc, 14 hdc (29)
Row 3. 1 ch turn, 29 sc (29)
Collar second part
Attach the white yarn to the front side of dress.
Row 1. 22 sc
Row 2. 2 ch turn, 14 hdc, 7 inc-dc, 1 dc (29)
Row 3. 1 ch turn, 29 sc (29)
Use pink blush makeup powder to make the rosy cheek on the doll’s cheeks.
All Finished.
Crochet Bag Amigurumi Monkey Backpack Free Pattern

The crochet monkey backpack is an enchanting and practical accessory for children and crochet enthusiasts alike. This delightful creation combines the charm of a cuddly monkey with the functionality of a small backpack, making it perfect for carrying small essentials. Crafted with soft yarn in shades of brown and cream, the backpack features a cute monkey face, complete with expressive eyes and a friendly smile, making it a perfect companion for little ones.
Creating your own crochet monkey backpack is a rewarding project that requires basic crochet skills and a few materials. You will need yarn in brown and cream colors, a 4mm crochet hook, safety eyes, a zipper, and some fiberfill for stuffing. The backpack is constructed by crocheting separate pieces for the head, body, arms, legs, ears, and tail, which are then assembled and attached to a small zippered pouch. The detailed step-by-step instructions below will guide you through the process.
Materials Needed:
- Brown yarn
- Cream yarn
- 4mm crochet hook
- Safety eyes (12mm)
- Zipper (20cm)
- Fiberfill
- Yarn needle
- Stitch marker
Abbreviations:
- ch = chain
- sc = single crochet
- inc = increase (2 sc in the next stitch)
- dec = decrease (sc 2 together)
- st = stitch
- rnd = round
Instructions:
Head:
- With brown yarn, make a magic ring.
- Rnd 1: 6 sc in the ring (6)
- Rnd 2: inc around (12)
- Rnd 3: (sc, inc) around (18)
- Rnd 4: (2 sc, inc) around (24)
- Rnd 5: (3 sc, inc) around (30)
- Rnd 6: (4 sc, inc) around (36)
- Rnd 7-12: sc around (36)
- Rnd 13: (4 sc, dec) around (30)
- Rnd 14: (3 sc, dec) around (24)
- Rnd 15: (2 sc, dec) around (18)
- Rnd 16: (sc, dec) around (12)
- Rnd 17: dec around (6)
- Fasten off, leaving a long tail for sewing.
Body:
- With cream yarn, ch 2.
- Rnd 1: 6 sc in the second ch from the hook (6)
- Rnd 2: inc around (12)
- Rnd 3: (sc, inc) around (18)
- Rnd 4: (2 sc, inc) around (24)
- Rnd 5-10: sc around (24)
- Rnd 11: (2 sc, dec) around (18)
- Rnd 12: (sc, dec) around (12)
- Rnd 13: dec around (6)
- Fasten off, leaving a long tail for sewing.
Arms (make 2):
- With brown yarn, make a magic ring.
- Rnd 1: 6 sc in the ring (6)
- Rnd 2: (sc, inc) around (9)
- Rnd 3-6: sc around (9)
- Fasten off, leaving a long tail for sewing.
Legs (make 2):
- With brown yarn, make a magic ring.
- Rnd 1: 6 sc in the ring (6)
- Rnd 2: (sc, inc) around (9)
- Rnd 3-5: sc around (9)
- Fasten off, leaving a long tail for sewing.
Ears (make 2):
- With brown yarn, make a magic ring.
- Rnd 1: 6 sc in the ring (6)
- Rnd 2: inc around (12)
- Rnd 3-4: sc around (12)
- Fasten off, leaving a long tail for sewing.
Tail:
- With brown yarn, ch 2.
- Rnd 1: 6 sc in the second ch from the hook (6)
- Rnd 2-20: sc around (6)
- Fasten off, leaving a long tail for sewing.
Assembly:
-
- Sew the head and body together.
- Attach the arms and legs to the body.
- Sew the ears to the sides of the head.
- Attach the tail to the bottom of the body.
- Insert safety eyes and embroider the mouth on the face.
- Attach the zippered pouch to the back of the monkey.
- Stuff the monkey with fiberfill and close any remaining openings.
Enjoy your adorable crochet monkey backpack!
Amigurumi Eeyore Horse Free Pattern Tutorial Crochet

Materials:
- Yarn in grey, light pink, cream, and dark brown for the mane.
- Crochet hook suitable for your yarn (3.5mm recommended for medium weight yarn).
- Safety eyes or buttons for eyes.
- Fiberfill for stuffing.
- Yarn needle.
- Stitch marker.
Abbreviations:
- ch – chain
- sc – single crochet
- hdc – half double crochet
- dc – double crochet
- inc – increase (2 sc in the next stitch)
- dec – decrease (sc next 2 stitches together)
- BLO – back loop only
- sl st – slip stitch
- st – number of stitches you should have at the end of the round
- ( ) – repeat whatever is between the parentheses the number of times stated
Head (use grey yarn):
- Start with a magic ring, 6 sc in ring [6].
- Inc in each st around [12].
- (Sc 1, inc) around [18].
- (Sc 2, inc) around [24].
- (Sc 3, inc) around [30].
- (Sc 4, inc) around [36]. 7-13. Sc around [36].
- (Sc 4, dec) around [30].
- (Sc 3, dec) around [24].
- (Sc 2, dec) around [18]. Place the safety eyes between rows 13 and 14, about 8 stitches apart.
- (Sc 1, dec) around [12]. Begin to stuff the head.
- Dec around [6]. Finish stuffing and close the hole.
Ears (make 2, with grey and pink yarn):
- With pink yarn, 6 sc in a magic ring [6].
- (Sc 1, inc) around [9].
- Sc around in BLO [9]. Change to grey yarn. 4-6. Sc around [9].
- (Sc 2, inc) around [12]. 8-10. Sc around [12]. Fasten off, leaving a long tail for sewing.
Body (use cream yarn):
- Start with a magic ring, 6 sc in ring [6].
- Inc in each st around [12].
- (Sc 1, inc) around [18].
- (Sc 2, inc) around [24].
- (Sc 3, inc) around [30]. 6-11. Sc around [30].
- (Sc 3, dec) around [24].
- (Sc 2, dec) around [18]. Begin stuffing.
- (Sc 1, dec) around [12].
- Dec around [6]. Finish stuffing and close the hole
Arms (make 2, use grey yarn):
- Start with a magic ring, 6 sc in ring [6]. 2-15. Sc around [6]. Stuff lightly.
Legs (make 2, use grey yarn):
- Start with a magic ring, 6 sc in ring [6].
- Inc in each st around [12]. 3-4. Sc around [12].
- (Sc 4, dec) twice [10]. 6-7. Sc around [10].
- (Sc 3, dec) twice [8]. 9-16. Sc around [8]. Stuff lightly.
Tail (use dark brown yarn):
- Chain 20, turn, hdc in the third chain from the hook, hdc in each chain back down the length. Fasten off, leaving a long tail for sewing.
Assembly:
- Sew the head to the body.
- Attach the ears to the head, making sure to fold them into the desired shape.
- Sew the arms to the sides of the body at around row 7.
- Attach the legs to the bottom of the body.
- Sew the tail to the back of the body.
- For the mane, cut several strands of dark brown yarn and attach them between the ears and down the back of the head using a latch hook method or by sewing.


