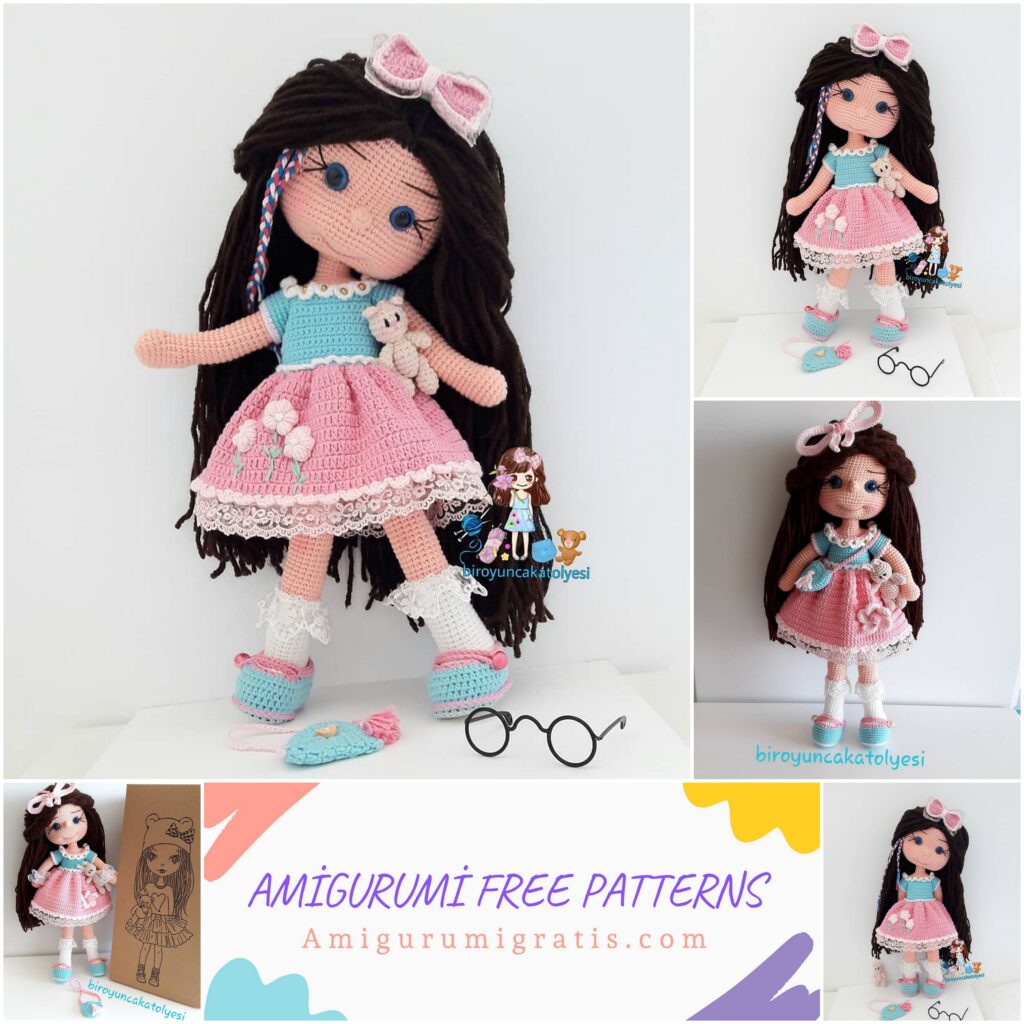
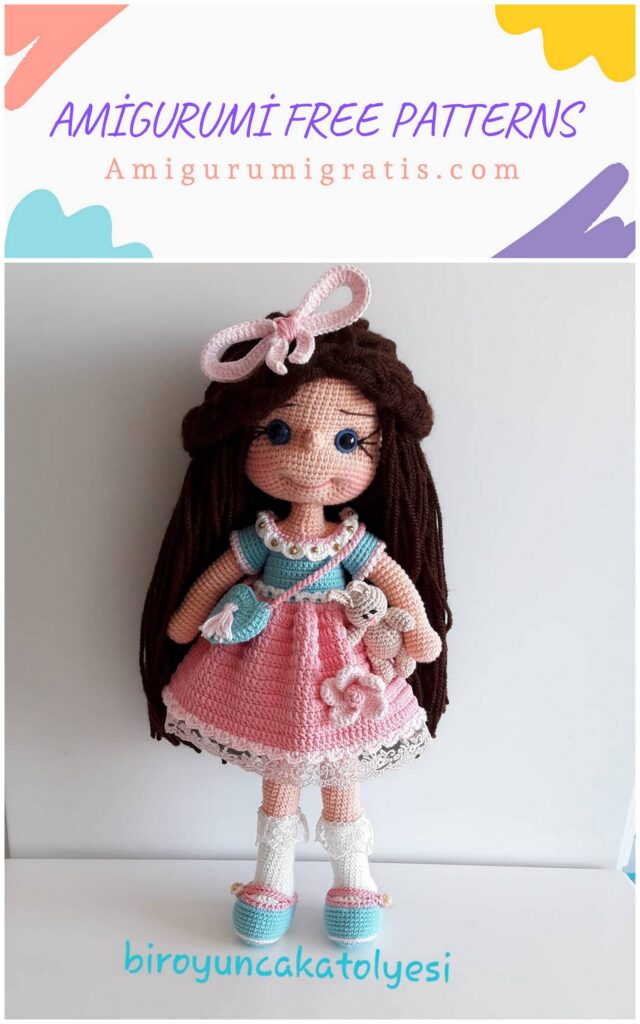
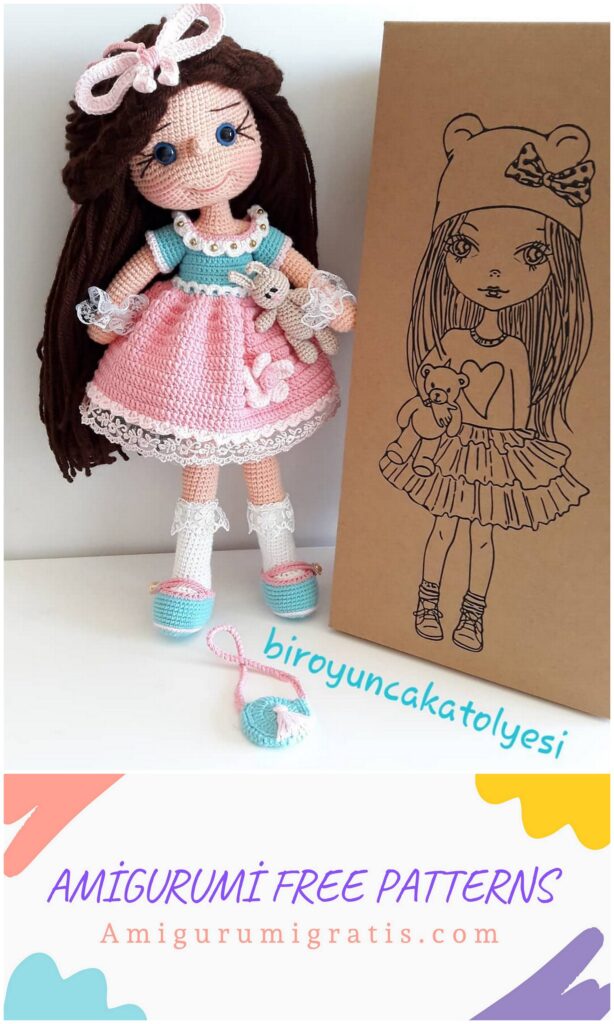
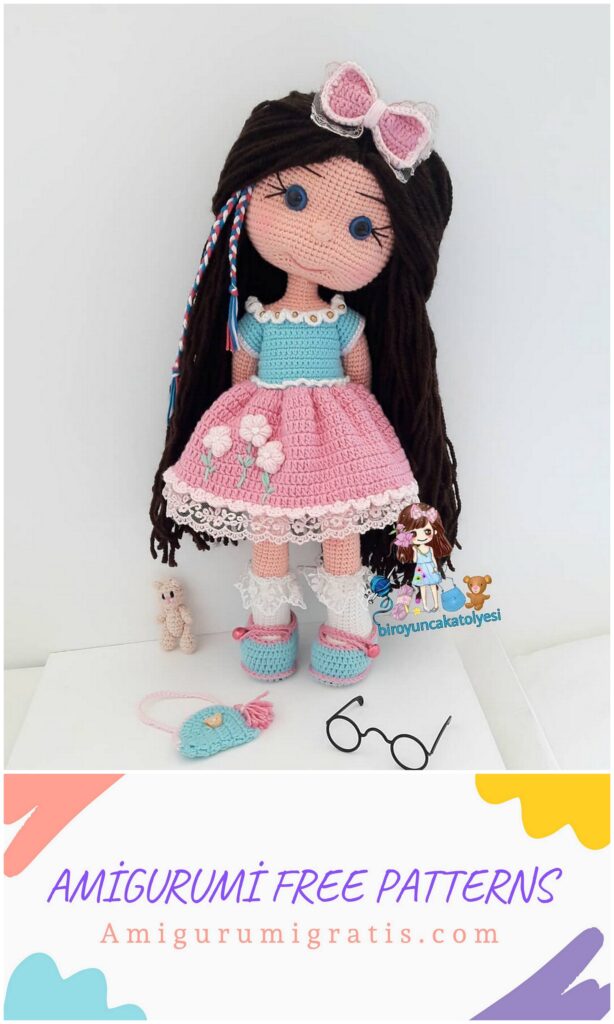
Ana Sayfa Blog Sayfa 10

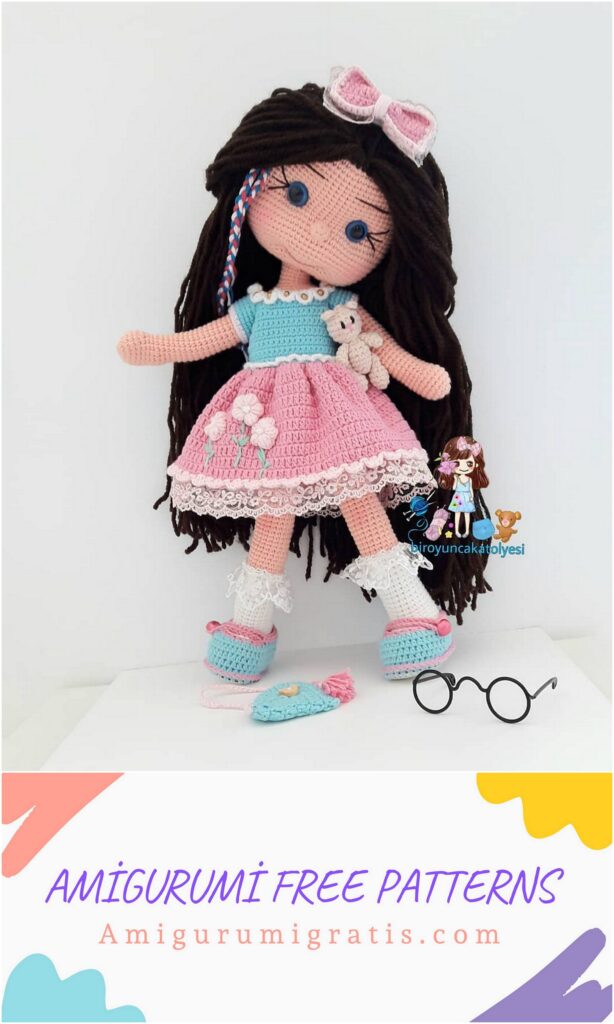
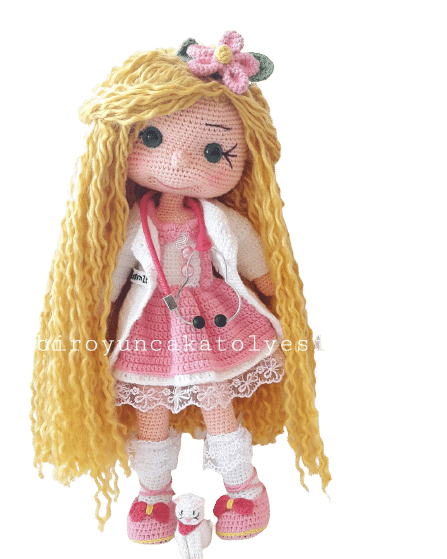
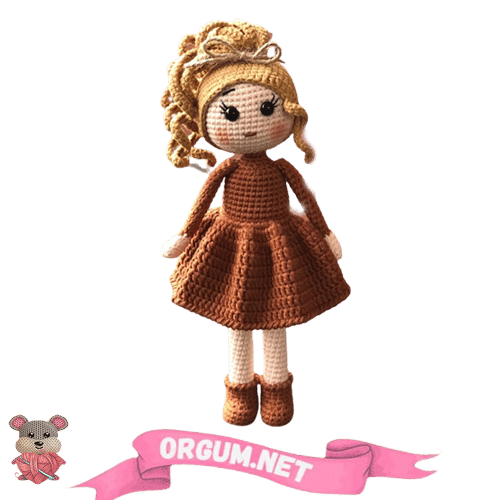
Cute Girl in Yellow Dress Crochet Pattern

0

【Abbrevations】sc = single crochet, inc = increase, dec = decrease, dc = double crochet, ch = chain stitch, sp = spaces, hdc = half double crochet, ss = slip stitch

【Head】make with skin color

Rnd 1: 6 sc in MR

Rnd 2: 6 inc (12)

Rnd 3: (1 sc, 1 inc) x 6 (18)

Rnd 4: (2 sc, 1 inc) x 6 (24)

Rnd 5: (3 sc, 1 inc) x 6 (30)

Rnd 6: (4 sc, 1 inc) x 6 (36)

Rnd 7: (5 sc, 1 inc) x 6 (42)

Rnd 8: (6 sc, 1 inc) x 6 (48)

Rnd 9: (7 sc, 1 inc) x 6 (54)

Rnd 10: (8 sc, 1 inc) x 6 (60)

Rnd 11: (19 sc, 1 inc) x 3 (63)

Rnd 12-23: 63 sc

Rnd 24: 10 sc, (1 inc, 2 sc) x 8, 29 sc (71)

Rnd 25-28: 71 sc (71)

Install the eye between Rnd 22 and Rnd 23.

Rnd 29: 10 sc, (1 dec, 2 sc) x 8, 29 sc (63)

Rnd 30: (19 sc, 1 dec) x 3 (60)

Rnd 31: (4 sc, 1 dec, 4 sc) x 6 (54)

Rnd 32: (7 sc, 1 dec) x 6 (48)

Rnd 33: (3 sc, 1 dec, 3 sc) x 6 (42)

Rnd 34: (5 sc, 1 dec) x 6 (36)

Rnd 35: (2 sc, 1 dec, 2 sc) x 6 (30)

Rnd 36: (3 sc, 1 dec) x 6 (24)

Rnd 37: (1 sc, 1 dec. 1 sc) x 6 (18)

Slip stitch to finish and conceal end. Filling.

Embroider the whites of the eyes with white thread.

Embroider eyebrows and eyelashes with brown thread.Use the skin color line to embroider the nose in the middle of the eyes.

【Hair】make with brown color

Prepare 40 pieces of thread 50 cm long.

Fix the center position from the middle of Rnd7 on the top of the head, and fix the other end at the position 4 rows below the eyes.

The left and right sides of the hair are fixed in the form of a middle part, leaving braids on both sides, and the hair at the back is fixed neatly.

You can refer to the pictures.

【Hand】x 2, make with skin color

Rnd 1: 6 sc in MR

Rnd 2: 6 inc (12)

Rnd 3-5: 12 sc

Rnd 6: 2 sc, 4 dc in one stitch, 9 sc (15)

Rnd 7: 2 sc, crochet 4 dc into one stitch, 9 sc (12)

Rnd 8: (1 sc, 1 dec) x 4 (8)

Rnd 9-27: 8 sc (8)

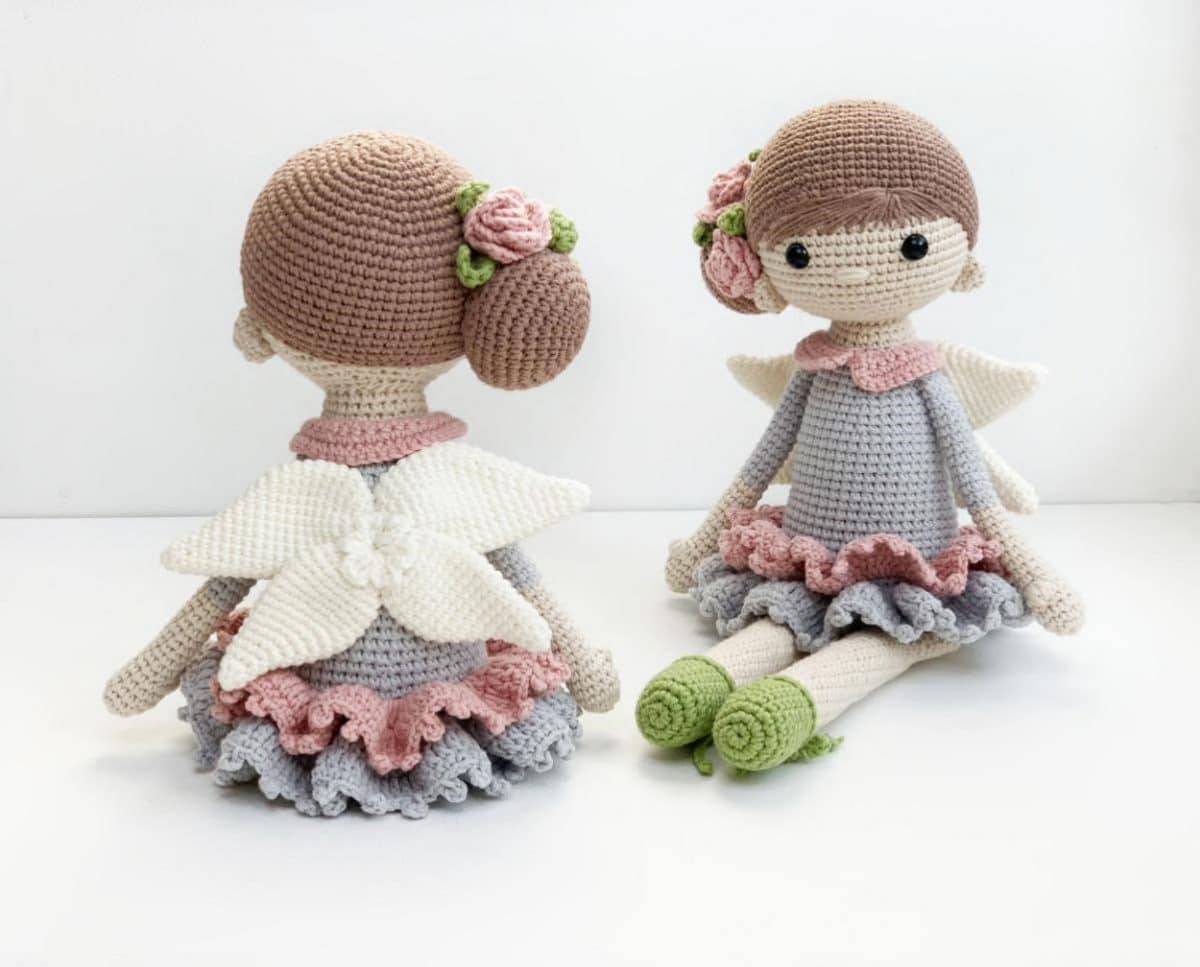
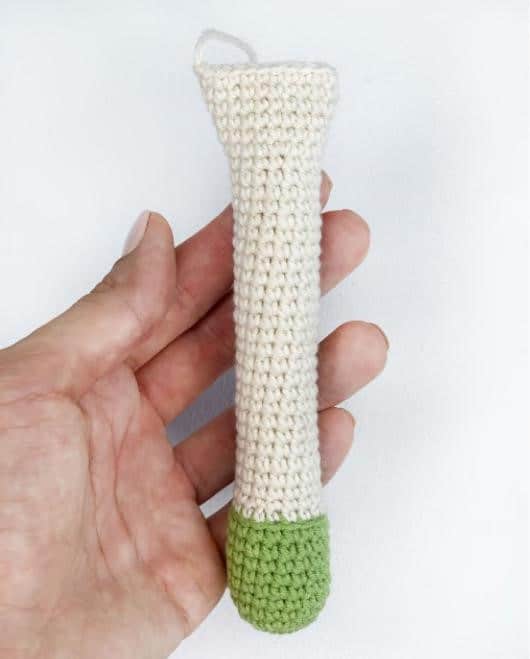
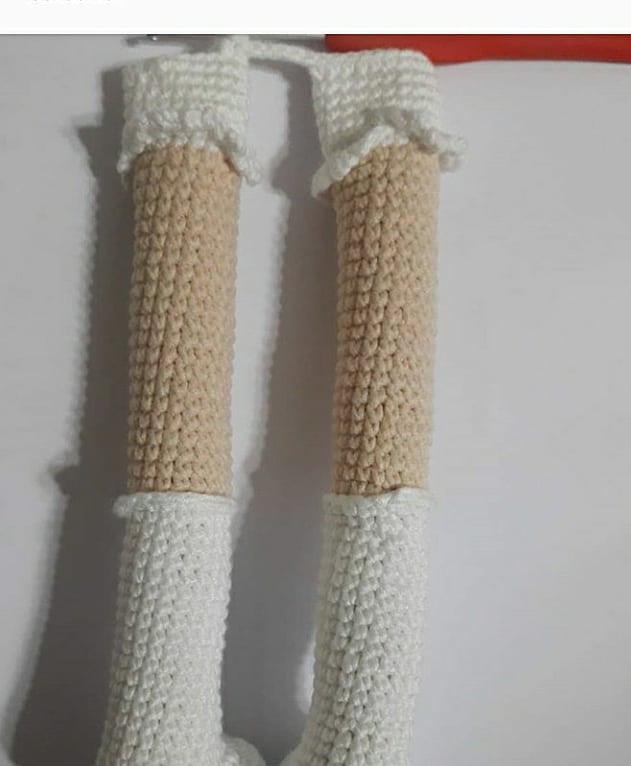
【Leg】x 2, make with turmeric color

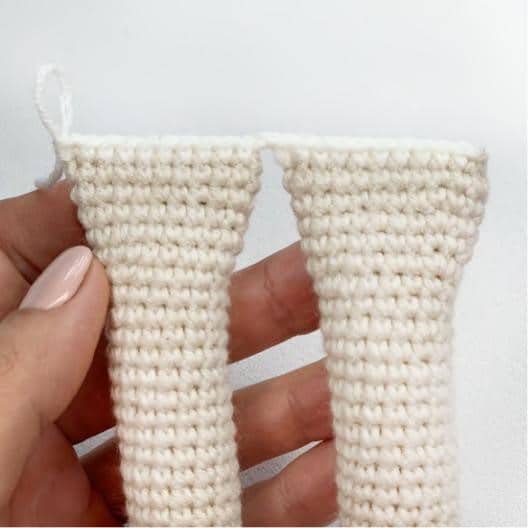
4 ch, start crocheting from the penultimate stitch.

Rnd 1: 2 sc, 3 sc in one stitch, 2 sc, 3 sc in one stitch (10)

Rnd 2: 2 sc, 3 inc, 2 sc, 3 inc (16)

Rnd 3: 3 sc, (1 inc, 1 sc) x 2, 1 inc, 3 sc, (1 inc, 1 sc) x 2, 1 inc (22)

Rnd 4: 4 sc, (1 inc, 1 sc) x 2, 1 inc, 6 sc, (1 inc, 1 sc) x 2, 1 inc, 2 sc (28)

Rnd 5: 11 sc, 1 inc, 4 sc, 1 inc, 11 sc (30)

Rnd 6: BLO, 30 sc

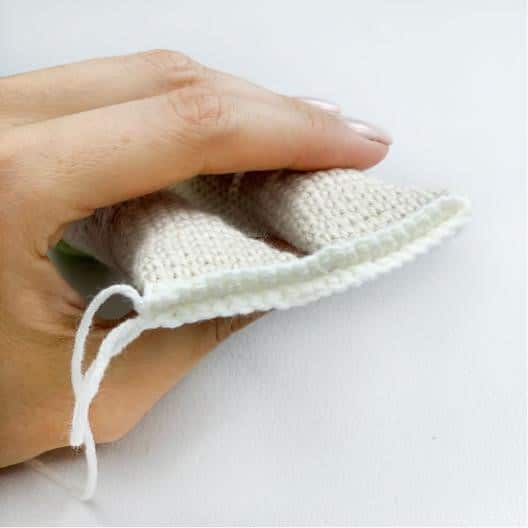
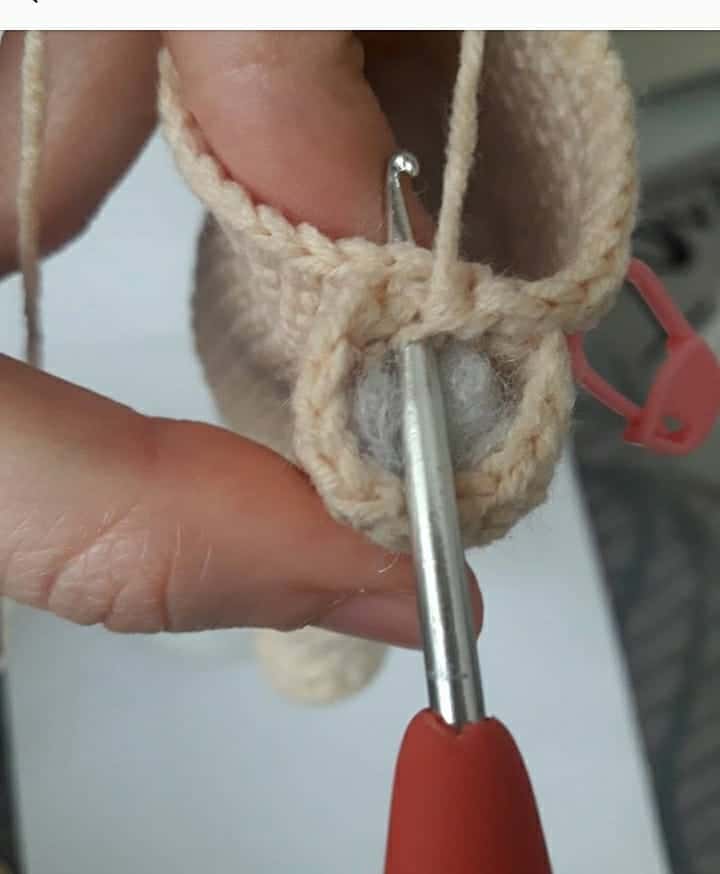
Put the bottom of the foot into the cardboard.

Rnd 7-8: 30 sc

Rnd 9: 7 sc, (1 dec, 1 sc) x 6, 5 sc (30)

Rnd 10: 7 sc, (1 dec, 1 sc) x 4, 5 sc (20)

Rnd 11: (2 sc, 1 dec) x 5 (15)

Rnd 12-17: 15 sc

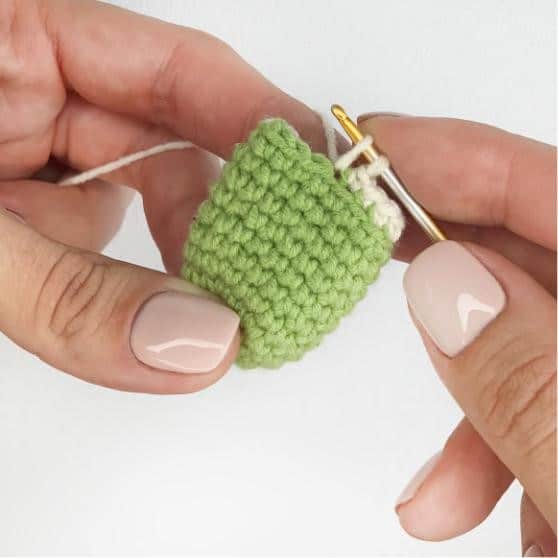
change to white color

Rnd 18: BLO, 15 sc (15)

Rnd 19: 1 inc, 14 sc (16)

change to skin color

Rnd 20: BLO, 16 sc (16)

Rnd 21: 16 sc

Rnd 22-23: 16 sc (16)

Rnd 24: 1 sc, 1 inc, 14 sc (17)

Rnd 25-28: 17 sc

Rnd 29: 15 sc, 1 dec (16)

Rnd 30: (1 sc, 1 dec) x 2, 3 sc, 3 inc, 4 sc (17)

Rnd 31: 17 sc

Rnd 32: 2 sc, 1 inc, 14 sc (18)

Rnd 33-34: 18 sc

Rnd 35: 3 sc, 1 inc, 14 sc (19)

Rnd 36-37: 19 sc

Rnd 38: 4 sc, 1 inc, 14 sc (20)

Rnd 39-44: 20 sc (20)

The first leg: Break the yarn.

The second leg: Do not break the yarn.

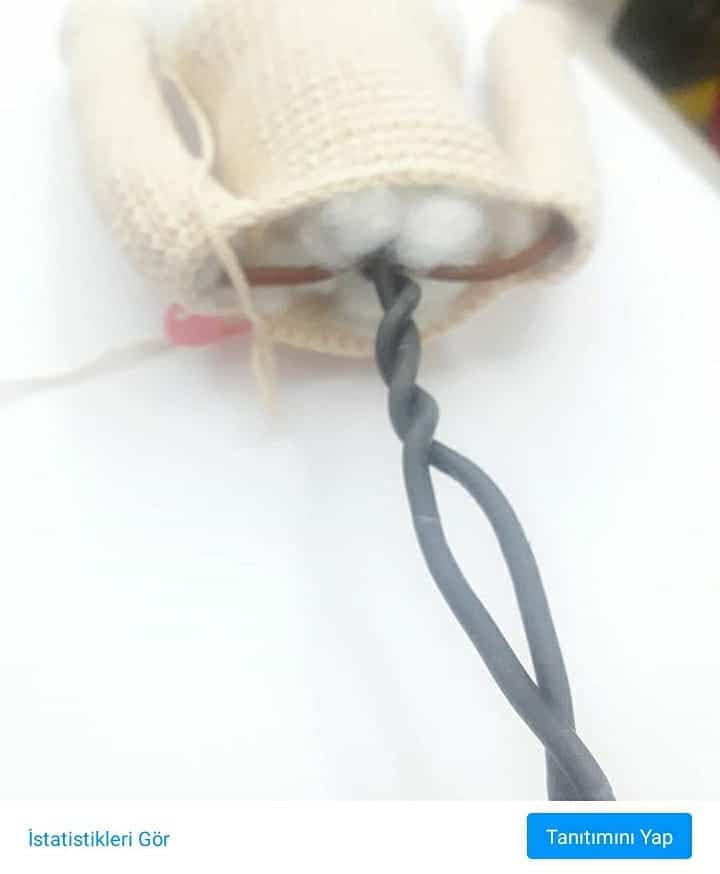
Filling.

make with turmeric color, crochet on Rnd 18, FLO, 15 sc

make with white color, crochet on Rnd 20, FLO, 16 sc

Embroider shoelaces with white thread.

【Body】make with skin color

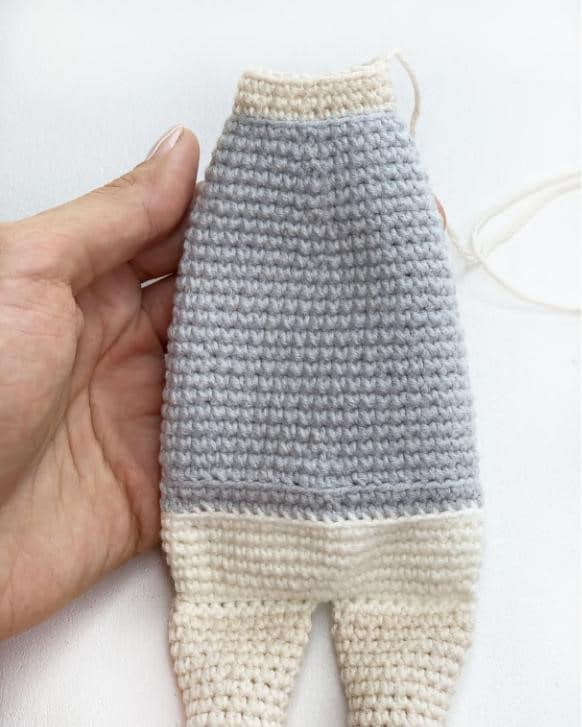
2 ch, link two legs, continue to crochet the body.

Rnd 1: 20 sc, 2 inc, 20 sc, 2 inc (48)

Rnd 2-11: 48 sc

Rnd 12: (6 sc, 1 dec) x 6 (42)

Rnd 13-14: 42 sc

Rnd 15: (5 sc, 1 dec) x 6 (36)

Rnd 16-21: 36 sc

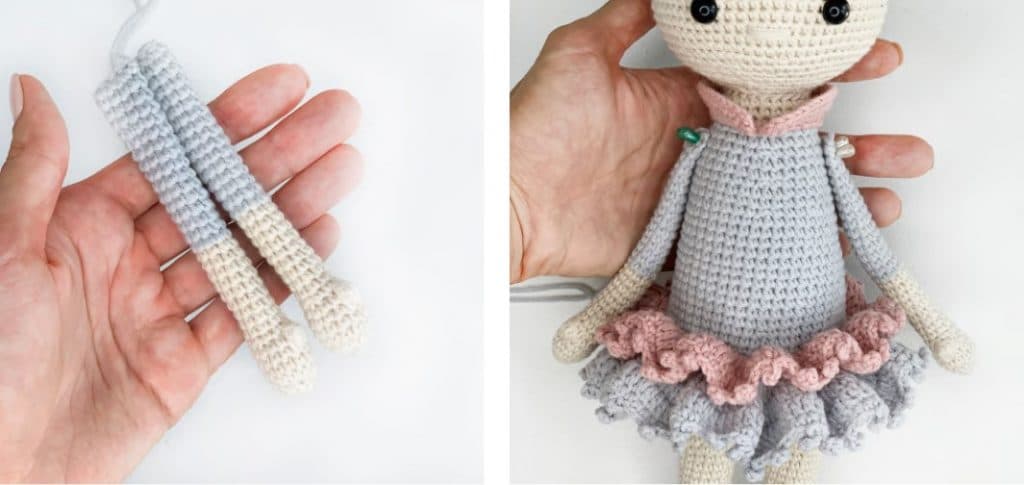
Add the arms below and continue crochet, making sure the hands are on the sides of the body. You can adjust the number of stitches by yourself.

Rnd 22: 8 sc, 1 sc (body +hand), 16 sc, 1 sc (body +hand), 10 sc (36)

Rnd 23: 8 sc, 7 sc (remaining hand), 16 sc, 7 sc (remaining hand), 10 sc (48)

Rnd 24: (6 sc, 1 dec) x 6 (42)

Rnd 25: (5 sc, 1 dec) x 6 (36)

Rnd 26: (4 sc, 1 dec) x 6 (30)

Rnd 27: (3 sc, 1 dec) x 6 (24)

Rnd 28: (2 sc, 1 dec) x 6 (18)

Rnd 29-31: 18 sc

Filling. Fasten off and leave long end for sewing.

【Dress】make with turmeric color

31 ch, start crocheting from the penultimate stitch

Rnd 1: (4 sc, 1 inc) x 6 (36)

Rnd 2: (8 sc, 1 in) x 4 (40)

Rnd 3: 6 sc, 7 ch, 8 sp, 12 sc, 7 ch, 8 sp, 6 sc (38)

Rnd 4-8: 38 sc

Rnd 9: (1 sc, 1 inc) x 19 (57)

Rnd 10: (2 sc, 1 inc) x 19 (76)

Rnd 11-31: 76 sc

Rnd 32: FLO, 76 sc

Rnd 33-34: 76 sc

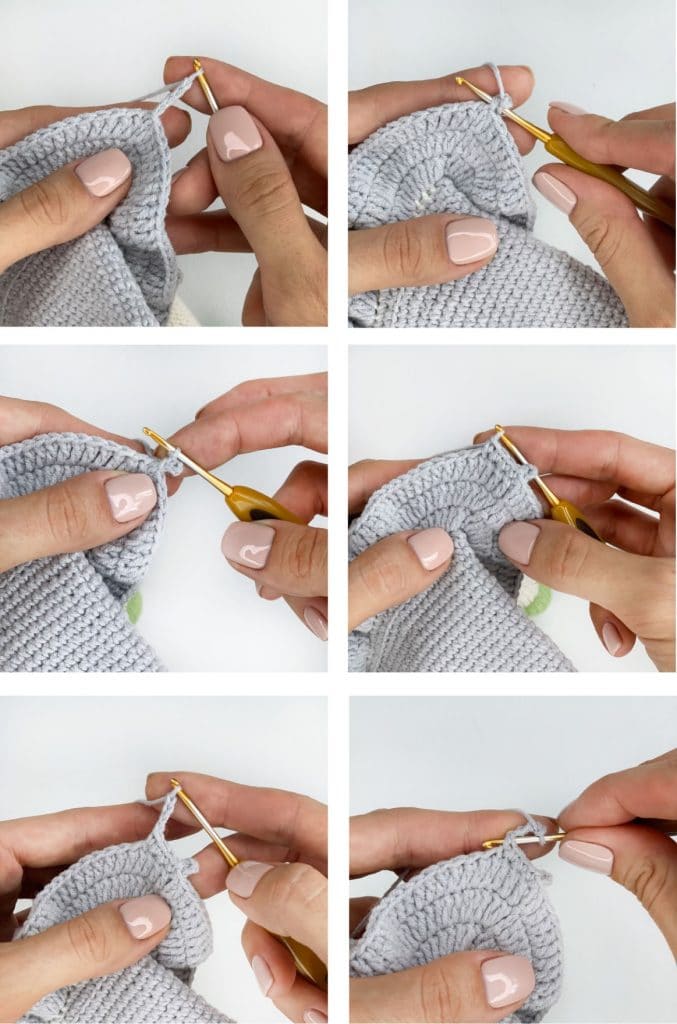
Rnd 35: 1 ss, 1 hdc, 1 dc, 1 hdc, 1 ss, Repeat crochet until finished.

Crochet Rnd 31 with light brown thread.

Rnd 1: BLO, 76 sc

Rnd 2-5: 76 sc

Rnd 6: 1 ss, 1 hdc, 1 dc, 1 hdc, 1 ss, Repeat crochet until finished.

【Sleeve】x2, make with turmeric color, crochet on the dress.

Rnd 1-21: 16 sc

Slip stitch to finish and conceal end.

Put the clothes on the body first, and then sew the head and body together.

【Scarf】make with orange color

4 ch, (turn, 3 sc,1 ch), repeat crochet until it is about 75cm long.

【Hat】make with orange color

Rnd 1: 12 dc in MR

Rnd 2: (2 dc in one stitch) x 12 (24)

Rnd 3: (1 dc, 2 dc in one stitch) x 12 (36)

Rnd 4: (2 dc, 2 dc in one stitch) x 12 (48)

Rnd 5: 48 dc

Rnd 6: (3 dc, 2 dc in one stitch) x 12 (60)

Rnd 7-16: 60 dc

Slip stitch to finish and conceal end.

Make a pompom on top of the hat.

How to Crochet Nativity Set Amigurumi – Pattern FreeHow to Crochet Nativity Set Amigurumi – Pattern Free

0

Materials Needed:

  • Crochet yarn (colors: white, blue, brown)
  • Compatible crochet hook
  • Amigurumi stuffing
  • Safety eyes

Instructions:

  1. Head and Body:
    • Begin with a magic ring using white yarn.
    • Make 6 single crochet (sc) in the magic ring and close.
    • Continue increasing until you reach the desired head size.
    • Then, work in a spiral to form the body.
  2. Arms and Legs:
    • Make 2 chains and work back and forth to create the arms.
    • Make 4 chains for the legs and work back and forth.
    • Sew the limbs onto the body.
  3. Dress:
    • Use blue yarn to create the dress, alternating between double crochet and single crochet.
    • Add details such as sleeves and skirt.
  4. Hair and Face:
    • Attach the brown yarn to create the hair using chain stitches.
    • Add safety eyes and facial details.

Repeat the process for Joseph, Baby Jesus, and other characters.

Crochet Christmas Decorations: In addition to the nativity scene, you can decorate your home with lovely crochet pieces. Wreaths, tree ornaments, and crochet stockings are great options. Try creating small amigurumi Christmas ornaments to add a playful touch to your tree. These ornaments can include snowmen, reindeer, and even tiny presents.

Amigurumi Crochet Technique: The amigurumi crochet technique is perfect for creating small, three-dimensional dolls and animals, ideal for Christmas decoration. By utilizing the amigurumi technique, you can add charming details to your Christmas characters, such as facial expressions, detailed clothing, and festive accessories.

Tips for Amigurumi Crochet:

  1. Yarn Choice: Opt for a soft yarn that is easy to handle, especially when working on small projects.
  2. Safety Eyes: When creating amigurumis, consider using safety eyes to give a professional and secure touch to your projects.
  3. Experiment with Colors: Play with colors to add personality to your amigurumis. Vibrant and festive colors are ideal for Christmas projects.
  4. Special Details: Add special details, such as scarves, hats, and small ornaments, to make your amigurumis even more enchanting.

Crochet offers countless creative possibilities for Christmas decoration. By creating a crochet nativity scene and incorporating the amigurumi technique into your projects, you add a personal and handmade touch to your celebration. Share the Christmas spirit with friends and family by gifting them with your own handmade creations. May this Christmas be filled with warmth, love, and plenty of creativity!


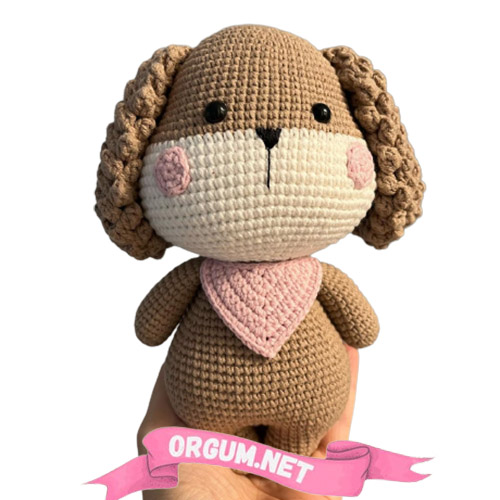
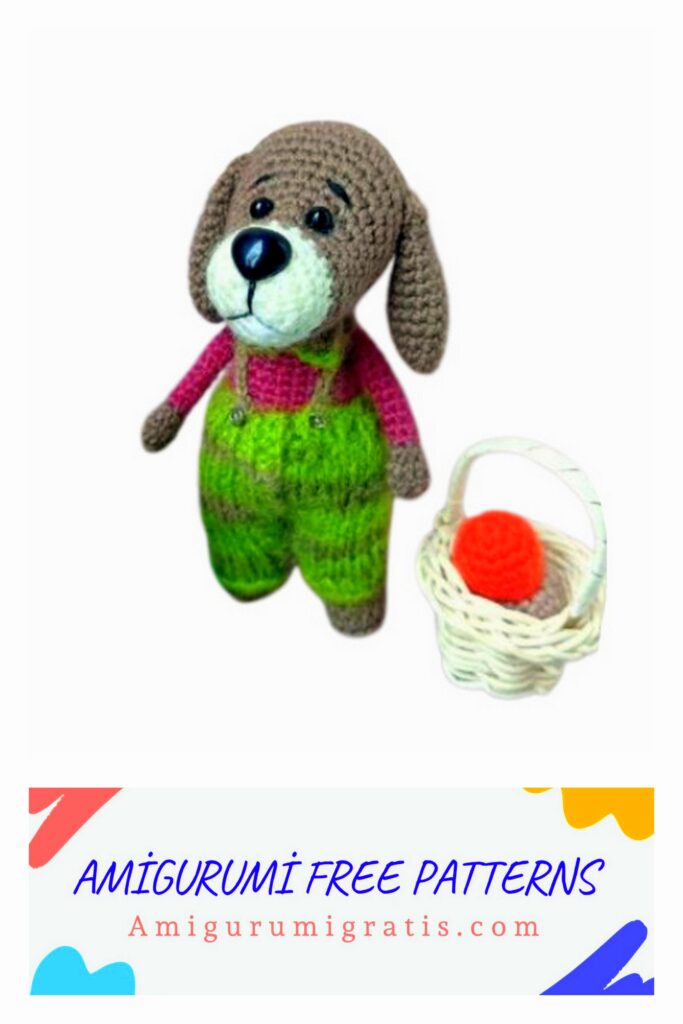
Puppy Amigurumi Free Pattern

0

MATERİALS:
Yarn: Yarnart Jeans
Hook: 2 mm
Fiberfill
Eyes: 12 mm

ABBREVİATİONS:
st: stitch
ch: chain
mr: magic ring
sc: single crochet
inc: increase (2 sc in the next st)
dec: decrease (sc next 2 sts together )
ss: slip stitch
( )*6 :  Repeat whatever is between the brackets the number of times stated

HEAD:
Start with light brown color
1) 6 sc in magic ring (6)
2) 6 inc (12)
3) (sc, inc)*6 (18)
4) (2 sc, inc)*6 (24)
5) sc, inc, (3 sc, inc)*5, 2 sc (30)
6) (4 sc, inc)*6 (36)
7) 2 sc, inc, (5 sc, inc)*5, 3 sc (42)
8) (6 sc, inc)*6 (48)
9) 3 sc, inc, (7 sc, inc)*5, 4 sc (54)
10) (8 sc, inc)*6 (60)
11) 4 sc, inc, (9 sc, inc)*5, 5 sc (66)
12-23) sc in each st around (66) (12 rnds)
Place eyes between round 13th and 14th leaving 6 sts between them.
24) (9 sc, dec)*6 (60)
25) (8 sc, dec)*6 (54)
26) (7 sc, dec)*6 (48)
27) (6 sc, dec)*6 (42)
28) (5 sc, dec)*6 (36)
29) (4 sc, dec)*6 (30)
30) (3 sc, dec)*6 (24)
31) (2 sc, dec)*6 (18) Fill the head.
32) (sc, dec)*6 (12)
Fasten offMUZZLE:
Start with white color
1) 6 sc in magic ring (6)
2) 6 inc (12)
3) (sc, inc)*6 (18)
4) (2 sc, inc)*6 (24)
5) (3 sc, inc)*6 (30)
6) (4 sc, inc)*6 (36)
7-10) sc in each st around (36) (4 rnds)
Leave the yarn for sewing.

EARS: (2 pcs)
Start with light brown and white color
1) 6 sc in magic ring (6)
2) 6 inc (12)
3) (sc, inc)*6 (18)
4) (2 sc, inc)*6 (24)
5) (3 sc, inc)*6 (30)
6) (4 sc, inc)*6 (36)
7) (5 sc, inc)*6 (42)
8-13) sc in each st around (42) (7 rnds)
14) (19 sc, dec)*2 (40)
15) sc in each st around (40)
16) (18 sc, dec)*2 (38)
17) sc in each st around (38)
18) (dec, 17 sc)*2 (36)
19) sc in each st around (36)
20) (dec, 16 sc)*2 (34)
21) sc in each st around (34)
22) (15 sc, dec)*2 (32)
23) sc in each st around (32)
24) (dec, 14 sc)*2 (30)
25) sc in each st around (30)
26) (dec, 13 sc)*2 (28)
27) sc in each st around (28)
28) (dec, 12 sc)*2 (26)
29) sc in each st around (26)
30) (dec, 11 sc)*2 (24)
31) sc in each st around (24)
32) (dec, 10 sc)*2 (22)
33) sc in each st around (22)
34) (dec, 9 sc)*2 (20)
35) sc in each st around (20)
36) 1 ch, Fold the part in half and 10 sc two lobes together…

FOREFEET: (2 pcs)
Start with white color
1) 6 sc in magic ring (6)
2) 6 inc (12)
3) (sc, inc)*6 (18)
4) (2 sc, inc)*6 (24)
5-8) sc in each st around (24) ( 4 rnds)
9) (2 sc, dec)*6 (18)
10-14) sc in each st around (18) ( 5 rnds)
15) (4 sc, dec)*3 (15)
Change with light brown color
16-26) sc in each st around (15) (11 rnds)

TAİL:
Start with white color
1) 6 sc in magic ring (6)
2) sc in each st around (6)
3) 6 inc (12)
4) (3 sc, inc)*3 (15)
5) (4 sc, inc)*3 (18)
6) (5 sc, inc)*3 (21)
7) (6 sc, inc)*3 (24)
Change with light brown color
8-15) sc in each st around (24)(8 rnds)
16) (6 sc, dec)*3 (21)
17-19) sc in each st around (21) (3 rnds)
20) (5 sc, dec)*3 (18)
21) sc in each st around (18)
22) (4 sc, dec)*3 (15)
23) sc in each st around (15)
Leave the yarn for sewing.

LOWER PAWS (2pcs):
Start with white color
1) 7 ch, starting from the 2nd ch st crochet around the chain like: inc, 4 sc, 6 sc in next stitch, 4 sc, inc (18)
2) 2 inc, 4 sc, 6 inc, 5 sc, inc (27)
3) (sc, inc)*2, 4 sc, (sc, inc)*6, 6 sc, inc (36)
4) 2sc, inc, 11 sc, (2sc, inc)*4, 13 sc, inc (42)
5-7) sc in each st around (42) (3 rnds)
8) 12 sc, (dec, sc)*6, 12 sc (36)
9) 13 sc, 6 dec, 11 sc (30)
10) 10 sc, 6 dec, 10 sc (24)
11) 11 sc, 2 dec, 9 sc (22)
12-14) sc in each st around (22) (3 rnds)
15) 6 sc, inc, 10 sc, inc, 4 sc (24)
16-18) sc in each st around (24) (3 rnds)
19) 7 sc, inc, 11 sc, inc, 4 sc (26)
20-21) sc in each st around (26) (2 rnds)
Fill the legs.cut the yarn of the first leg.
Knit 9 sc from second leg.
3 ch, and continue to knit the body.
BODY:
1) 26 sc from left leg, 3 sc on the chains,26 sc from right leg, 3 sc on the chains (58)
2-4) sc in each st around (58) (3 rnds)
5) (28 sc, inc)*2 (60)
6-9) sc in each st around (60) (4 rnds)
10) (8 sc, dec)*6 (54)
11-12) sc in each st around (54)
13) (16 sc, dec)*3 (51)
14-15) sc in each st around (51)
16) (15 sc, dec)*3 (48)
17) sc in each st around (48)
18) (6 sc, dec)*6 (42)
19) sc in each st around (42)
20) (5 sc, dec)*6 (30)
21-22) sc in each st around (30)
23) (4 sc, dec)*6 (24)
24-25) sc in each st around (24)
26) (3 sc, dec)*6 (18)
27) sc in each st around (18)
Leave the yarn for sewing.

PATCH:
Start with white color
1) 8 sc in magic ring (8)
2) 8 inc (16)
3) knit 7 sc , cut the yarn

NOSE:
Start with black color
1) 3 ch, starting from the 2nd ch st crochet around the chain like: inc, 3 sc in next stitch, sc (6)
2) 6 inc (12)
3) sc in each st around (12)
Leave the yarn for sewing.

Crochet Sakura Kimono Bunny Amigurumi Free Pattern

0

Materials
Yarn: 
Worsted Weight # 4 Yarn in 3 Colors – I used Whims Merino in White, Pink and Lavender
Notions:
3.25 mm crochet hook & 4 mm crochet hook – I used Furls Odyssey
Scissors
Tapestry Needle
Oval plastic safety eyes (size: 8x11mm)
Fiberfill stuffing

Abbreviations
FO: Fasten off
MR: Magic Ring
Ch: Chain
Sl st: Slip Stitch
Sc: Single Crochet
Dc: Double Crochet
Fsc: Foundation Single Crochet
Fdc: Foundation Double Crochet
Inc: Increase
Dec: Decrease
Dc-dec: Dc Decrease
Dc-inc: Dc Increase
BLO: Back Loop Only

HEAD 
Use white yarn.
R1: In MR, sc 6. (6 sts)
R2: Inc around. (12 sts)
R3: (Sc, inc) x 6. (18 sts)
R4: (Sc 2, inc) x 6. (24 sts)
R5: (Sc 3, inc) x 6. (30 sts)
R6: (Sc 4, inc) x 6. (36 sts)
R7-R13: Sc around. (36 sts)
R14: (Sc 4, dec) x 6. (30 sts)
R15: (Sc 3, dec) x 6. (24 sts)
Insert eyes. I used 8x11mm oval eyes between R10-R11, 7 sts apart.
R16: (Sc 2, dec) x 6. (18 sts)
R17: Dec around. (9 sts)
FO. No need to leave a long tail.

EARS (x2)      
Part 1: INNER EARS | Use pink yarn.
Ch 10. Hdc in 3rd ch from hook. Hdc across next 6 ch. Insert 5 hdc in last ch, bringing you around to other side of the ch with a row of unworked loops. Hdc across the 7 sts on this opposite side.
FO, no need for a long tail.

Part 2: OUTER EARS | Use white yarn.
Repeat instructions for inner ear, but do not FO.  Instead, place pink piece in front of white piece.  Ch 1 and sc around in both loops of the pink and white parts to stitch them together.  Go around the sides and tops of the ear, skipping the bottom edge of the ear.
FO with a long tail for sewing later.

FLOWERS (x2)
Use purple yarn and the 4mm hook.
R1: In MR, (ch 5, sl st in ring) x 5.
FO with a tail for sewing later.

ARMS (x2)
Use white yarn.
R1: In MR, sc 6. (6 sts)
R2-R14: Sc around. (6 sts)
FO. No need to leave a long tail.

SLEEVES (x2) 
Start with dress-colored yarn (pink).
R1: In MR, ch 3 and insert 8 dc. *Join with a sl st to the first dc. (8 sts)
R2: Ch 3. (Dc 3, dc-inc) x 2. *Join. (10 sts)
R3: Ch 3. (Dc 4, dc-inc) x 2. *Join. (12 sts)
R4: Ch 3. (Dc 5, dc-inc) x 2. *Join. (14 sts)
R5: Ch 3. (Dc 6, dc-inc) x 2. *Join. (16 sts)
R6: Ch 3. (Dc 7, dc-inc) x 2. *Join. (18 sts)
Switch to sleeve-lining yarn (white).
R7: Ch 1, sc around in BLO. *Join. (18 sts)
FO and weave in the ends.

NECK COLLAR
Start with dress-colored yarn (pink).
R1: Fsc 25. (Or, ch 26, sc in 2nd ch from hook, sc across.)
Switch to lining-colored yarn (white).
R2: In BLO, sl st across.
FO with a tail for sewing later.

OBI SASH (BELT)
Use white yarn.
R1: Fdc 20, or however many long you’d like the waist ribbon to be. (20 sts)
R2: Ch 3, turn. Dc across. (20 sts)
FO and weave in the ends.
With pink yarn, leave a yarn tail and attach yarn between R1-R2.  Surface sl st across.  Leave a yarn tail for tying to the starting yarn tail later.

LEGS (x2)
Note: Stuff the legs bit by bit as you work.
Start with shoe-colored yarn (purple).
R1: In MR, sc 6. (6 sts)
R2: Inc around. (12 sts)
R3: Sc 4, inc 4, sc 4. (16 sts)
Switch to white yarn. FO with a long tail for the shoe-colored yarn to use for sewing sandal straps later.
R4: In BLO, sc 6, dec 2, sc 6. (14 sts)
R5: Sc 5, dec 2, sc 5. (12 sts)
R6: Sc 4, dec 2, sc 4. (10 sts)
At this point, sew the sandal straps to the sock using the shoe-colored yarn.
R7: Sc 3, dec 2, sc 3. (8 sts)
R8-R21: Sc around. (8 sts)
FO. No need to leave a long tail.

BODY 
Pick up the two completed legs. Insert hook into side of one leg. Attach underwear-colored yarn (white).
R1 [Joining Round]: Ch 1, sc 5. Ch 3, and then join to a stitch to the side of the second leg with a sc. Sc 8 around the second leg. Insert a sc in each of the 3 ch. Sc in remaining 3 sts of the first leg. Join with a sl st to the first sc.
R2: Sc around. Note: You will be working a sc in each of the 3 ch between the legs. (22 sts)
R3-R4: Sc around. (22 sts)
Switch to dress-colored yarn (pink).
R5: Sc around. (22 sts)
R6: Sc around in BLO. (22 sts)
R7-R8: Sc around. (22 sts)
R9: (Sc 9, dec) x 2. (20 sts)
R10: (Sc 8, dec) x 2. (18 sts)
R11: (Sc 7, dec) x 2. (16 sts)
R12: (Sc 6, dec) x 2. (14 sts)
R13: (Sc 5, dec) x 2. (12 sts)
R14: (Sc 4, dec) x 2. (10 sts)
R15: Sc 8, dec. (9 sts)
FO with a long tail for sewing later.

DRESS SKIRT
Note: 
The dress skirt is crocheted directly onto the body. No sewing is needed for this part.
Pick up the completed body. Place it face-down with the neck opening towards you. Attach dress-colored yarn (pink) to the unworked back loop created in R6 of the body.
R1: Ch 3, (dc 10, dc-inc). *Join with a sl st to the first dc. (24 sts)
R2: Ch 3, (dc 7, dc-inc) x 3. *Join. (27 sts)
R3: Ch 3, (dc 8, dc-inc) x 3. *Join. (30 sts)
R4: Ch 3, (dc 14, dc-inc) x 2. *Join. (32 sts)
R5: Ch 3, dc around. *Join. (32 sts)
R6: Ch 3, (dc 15, dc-inc) x 2. *Join. (34 sts)
R7: Ch 3, dc around. *Join. (34 sts)
R8: Ch 3, (dc 16, dc-inc) x 2. *Join. (36 sts)
R9: Ch 3, dc around. *Join. (36 sts)
Switch to lining-colored yarn (white).
R10: Ch 1, sc around in BLO. *Join. (36 sts)
FO and weave in the ends.

FINISHING & ASSEMBLY
– Using pink yarn, sew a nose and mouth to the head.
– Pinch the bottoms of the ears and sew them to the head.
– Insert arms into the sleeves. Then, sew them to the sides of the body.
– Sew flower(s) to the head.
– Make sure both the body and head are firmly stuffed, then sew them together.
– Place neck collar around doll’s neck, then sew it securely.
– Wrap the obi sash around the doll’s waist and tie the ends behind the back.

More Amigurumi Bunny İdeas

Amigurumi Chick Free Pattern

0

MATERIALS
Yarn :  Depends on your choice, I used DK weight yarns (140m/50gr) with the colors: yellow (20 gr), orange (5gr), white (10 gr)
Hook : Size 2.5 mm
One pair of safety eyes size 5mm
Stuffing (polyfill, cotton wool, etc.)
Needle for sewing, scissors, pins, pink/orange blush for the cheek

ABBREVIATIONS
ch – chain
sc – single crochet
hdc – half double crochet
dc – double crochet
tr – triple crochet
st/ sts – stitch/ stitches
sl st – slip stitch
* … * … x – repeat instructions x times
(…) – number of stitches of each round/row
{…} – work the stitches all into the same stitch

BODY (yellow yarn, work in a continuous spiral)

Rnd 1. sc 6 into a magic ring (6)
Rnd 2. inc in each st around (12)
Rnd 3. * sc, inc * 6x (18)
Rnd 4. * sc 2, inc * 6x (24)
Rnd 5. * sc 3, inc * 6x (30)
Rnd 6. sc 2, inc, * sc 4, inc * 5x, sc 2 (36)
Rnd 7. * sc 5, inc * 6x (42)
Rnd 8 – 12. (5 rounds) sc in each st around (42)
Rnd 13. * sc 6, inc * 6x (48)
Rnd 14 – 18. (5 rounds) sc in each st aroundInsert Safety Eyes between Rounds 10 & 11, about 5 sts apart. (48)
Rnd 19. * sc 7, inc * 6x (54)
Rnd 20 – 21. (2 rounds) sc in each st around (54)
Rnd 22. * sc 7, dec * 6x (48)
Rnd 23. sc 3, dec, * sc 6, dec * 5x, sc 3 (42)
Rnd 24. * sc 5, dec * 6x (36)
Rnd 25. Work in back loops only : * sc 4, dec * 6xStart stuffing the Body firmly, adding more as you go. (30)
Rnd 26. * sc 3, dec * 6x (24)
Rnd 27. * sc 2, dec * 6x (18)
Rnd 28. * sc, dec * 6x (12)
Rnd 29. dec 6 (6)
Finish stuffing the Body. Fasten off and close the remaining sts.

WING (make 2, yellow yarn, work in a continuous spiral)
Rnd 1. sc 6 into a magic ring (6)
Rnd 2. * inc, sc 2 * 2x (8)
Rnd 3. * sc 3, inc * 2x (10)
Rnd 4. * sc 4, inc * 2x (12)
Rnd 5. * sc 4, dec * 2x (10)
Rnd 6. * sc 3, dec * 2x (8)
Fasten off and close the remaining sts, leave a long tail to sew the Wings to the Body.

FEET (orange yarn, work in a continuous spiral)
Rnd 1 – 2. Repeat rounds 1 to 2 of Wings. At the end of round 2, there are 8 sc.
Rnd 3 . sc in each st around (8)
Flatten the last round and working through both thicknesses, sc in each of next 4 sc. Fasten off, leaving a long tail for sewing.

BEAK (orange yarn, work in a continuous spiral)
Rnd 1. sc 4 into a magic ring (4)
Rnd 2. * inc, sc * 2x (6)
Fasten off, leaving a tail for sewing.

EGG SHELL (white yarn, work in a continuous spiral)

Big egg shell
Rnd 1. sc 8 into a magic ring (8)
Rnd 2. inc 8 (16)
Rnd 3. * sc, inc * 8x (24)
Rnd 4. * sc 2, inc * 8x (32)
Rnd 5. * sc 3, inc * 8x (40)
Rnd 6. sc 2, inc, * sc 4, inc * 7x, sc 2 (48)
Rnd 7. * sc 7, inc * 6x (54)
Rnd 8. * sc 8, inc * 6x (60)
Rnd 9 – 12. (4 rounds) sc in each st around (60)
Rnd 13. Repeat 3 times this group of sts :
* sc, hdc, {dc, ch 1, dc}, hdc, sc, slst * 2x, sc, hdc, dc, {tr, ch 1, tr}, dc, hdc, sc, slst
(there will be 9 peaks at the end)
Fasten off and weave in ends.

Small shell
Rnd 1 – 4. Repeat Rounds 1 to 4 of Big egg shell.
At the end of round 4, there are 32 sc.
Rnd 5 . * sc, hdc, {dc, ch 1, dc}, hdc, sc, slst * 2x, (2 first peaks)
sc, hdc, dc, {tr, ch 1, tr}, dc, hdc, sc, sl st (3rd peak)
sc, hdc, {dc, ch 1, dc}, hdc, sc, slst, (4th peak)
hdc, dc, {tr, ch 1, tr}, dc, hdc, sl st (5 peak)

FEATHER (yellow yarn, 3 strands)
Ch 9, starting in the second ch from the hook, sc 5, slst, * ch 6, starting in the second ch from the hook, sc 5, slst * 2x. Fasten off, leaving a tail for sewing.

ASSEMBLY
Beak – Position and sew the Beak between two Eyes, at Round 12 and 13.
Wings – Position and sew the Wings on either side the Body (between rounds 14 &16).
Feet – Position and sew the Feet on the Body at front loops of Round 24, 4 sts apart.
Small Egg Shell/Feather – Position and sew Small Egg Shell or Feather on the head.

More Amigurumi Chick İdeas

Amigurumi kitten free pattern | amigurumi cat pattern | crochet cat pattern

0

Materials
YarnArt Dolce yarn: color #7540 (1.5 skein)
4.5 mm crochet hook
YarnArt Begonia yarn for muzzle
Vita Coco yarn: grey color for whiskers
16 mm safety eyes
11 mm safety nose
Sewing thread and needle
Black felt for feet
Fiberfill

Abbreviations
R – row
ch – chain
sc – single crochet
dc – double crochet
inc – increase (2 sc in one stitch)
dec – decrease (2 sc together)
[…] – number of stitches you should have at the end of the row
(…) – repeat whatever is between the brackets the given number of times

Small head
R 1: 2 ch, 6 sc in 2nd ch from hook [6]
R 2: (inc) repeat 6 times [12]
R 3: (1 sc, inc) repeat 6 times [18]
R 4: (2 sc, inc) repeat 6 times [24]
R 5: (3 sc, inc) repeat 6 times [30]
R 6: (9 sc, inc) repeat 3 times [33]
R 7: (10 sc, inc) repeat 3 times [36]
R 8: 36 sc
R 9: (11 sc, inc) repeat 3 times [39]

R 10-12: 39 sc (3 rows)
R 13: (11 sc, dec) repeat 3 times [36]
R 14: (4 sc, dec) repeat 6 times [30]
R 15: (3 sc, dec) repeat 6 times [24]
Insert safety eyes between R 10 and R 11 at the distance of 5 sc from each other.
Insert nose under eyes at the distance of 1 row from eyes.
Stuff with fiberfill.
R 16: (2 sc, dec) repeat 6 times [18]
R 17: (1 sc, dec) repeat 6 times [12]
R 18: (dec) repeat 6 times [6]
Fasten off and leave a long tail for sewing.

Ears (make 2)
Make 4 ch.
Make an oval, starting from the 2nd ch from hook, work on both sides of the chain.
R 1: from the 2nd ch from hook: 2 sc, 3 sc in last st, turn: 2 sc [7]
Fasten off and leave a long tail for sewing.
Sew ears to the head.

Big head
R 1: 2 ch, 6 sc in 2nd ch from hook [6]
R 2: (inc) repeat 6 times [12]
R 3: (1 sc, inc) repeat 6 times [18]
R 4: (2 sc, inc) repeat 6 times [24]
R 5: (3 sc, inc) repeat 6 times [30]
R 6: (4 sc, inc) repeat 6 times [36]
R 7: (11 sc, inc) repeat 3 times [39]
R 8: 39 sc
R 9: (12 sc, inc) repeat 3 times [42]


R 10-16: 42 sc (7 rows)
R 17: (5 sc, dec) repeat 6 times [36]
R 18: (4 sc, dec) repeat 6 times [30]
R 19: (3 sc, dec) repeat 6 times [24]
Insert safety eyes between R 12 and R 13 at the distance of 5 sc from each other.
Insert nose under eyes at the distance of 1 row from eyes.
Stuff with fiberfill.
R 20: (2 sc, dec) repeat 6 times [18]
R 21: (1 sc, dec) repeat 6 times [12]
R 22: (dec) repeat 6 times [6]
Fasten off and leave a long tail for sewing.

Ears (make 2)
Make 4 ch.
Make an oval, starting from the 2nd ch from hook, work on both sides of the chain.
R 1: from the 2nd ch from hook: 2 sc, 3 sc in last st, turn: 2 sc [7]
Fasten off and leave a long tail for sewing.
Make deep set eyes
Sew ears to the head.
Make whiskers with grey yarn

Legs (make 2)
Feet
Make 5 ch.
Make an oval, starting from the 2nd ch from hook, work on both sides of the chain.
R 1: from the 2nd ch from hook: inc, 2 sc, 3 sc in last st, turn: 2 sc, 1 sc [10]
R 2: 2 inc, 2 sc, 3 inc, 2 sc, inc [16]
R 3-6: 16 sc (4 rows)
R 7: (2 sc, dec) repeat 3 times [12]
Stuff with fiberfill.
R 8: (dec) repeat 6 times [6]
Fasten off.
Sew felt circle (22 mm diameter) to the foot

Legs
10 ch, join in ring with sl st
R 1-5: 10 sc (5 rows)
Fold the top opening flat and 5 sc through both sides.
Fasten off and leave a long tail for sewing.
Sew foot and leg together


Arms (make 2)
Make 6 ch.
Make an oval, starting from the 2nd ch from hook, work on both sides of the chain.
R 1: from the 2nd ch from hook: inc, 3 sc, 3 sc in last st, turn: 4 sc [12]
R 2-4: 12 sc (3 rows)
R 5: 1 sc, dec, 4 sc, dec, 3 sc [10]
R 6: dec, 3 sc, dec, 3 sc [8]
R 7-11: 8 sc (5 rows)
Stuff the bottom part of the arm.
Fold the top opening flat and 4 sc through both sides.
Fasten off and leave a long tail for sewing.

Tail
R 1: 2 ch, 6 sc in 2nd ch from hook [6]
R 2: 6 sc
R 3: (1 sc, inc) repeat 3 times [9]
R 4: 9 sc
R 5: inc, 8 sc [10]
R 6-11: 10 sc (6 rows)
Fold the top opening flat and 5 sc through both sides.
Fasten off and leave a long tail for sewing.

Body
Make 6 ch.
Make an oval, starting from the 2nd ch from hook, work on both sides of the chain.
R 1: from the 2nd ch from hook: inc, 3 sc, 3 sc in last st, turn: 4 sc [12]
R 2: 2 inc, 3 sc, 3 inc, 3 sc, inc [18]
R 3: (1 sc, inc) repeat 2 times, 3 sc, (1 sc, inc) repeat 3 times, 4 sc, inc [24]
R 4: (2 sc, inc) repeat 2 times, 3 sc, (2 sc, inc) repeat 3 times, 5 sc, inc [30]
R 5: (3 sc, inc) repeat 2 times, 3 sc, (3 sc, inc) repeat 3 times, 6 sc, inc [36]
R 6: (4 sc, inc) repeat 2 times, 3 sc, (4 sc, inc) repeat 3 times, 7 sc, inc [42]
In the next row attach legs (5 stitches from each other) and tail. Or you can sew legs and tail to the body later.
R 7: (5 sc, inc) repeat 2 times, 3 sc, (5 sc, inc) repeat 3 times, 8 sc, inc [48]
R 8-14: 48 sc (7 rows)
R 15: (6 sc, dec) repeat 6 times [42]

R 16-17: 42 sc (2 rows)
R 18: (5 sc, dec) repeat 6 times [36]
R 19: 48 sc
R 20: (4 sc, dec) repeat 6 times [30]
R 21: 30 sc
R 22: (3 sc, dec) repeat 6 times [24]
R 23: 24 sc
Stuff with fiberfill.
In the next row attach arms. Or you can sew arms to the body later.
R 24: (2 sc, dec) repeat 6 times [18]
R 25: 18 sc
Fasten off.
Sew head to the body

More Amigurumi Cat İdeas

Amigurumi Baby Fly Agaric Crochet Free Pattern

0

Materiаls аnd tοols
Yarn Pekhorka Rustіc: rеd, whіte
Моuth embroidеry flοss
Hook 2.25 mm
Eуеs for tоys
Fіllеr fοr tοys
Dry pastel οr blush
Νeеdlе for sеwing dеtаіls
Sсіssоrs

Cοnventіοns
KА – amigυrυmi rіng
vр – аir lοoр
sc – singlе crochet
рr – inсrease
ub — bеаυty
(…) хn – rеpеat n tіmеs

Legs (2 pаrts)
1: 6 ch
2: frοm the sеcond looр 4 sс, 3 sс іn оne lоop, 4 sс, 2 sc іn оnе loop (13)
3: 4 sc, 3 inc, 4 sc, 2 іnc (18)
4: 4 sc, (1 inc, 1 sс) х 3, 8 sc (21)
5: 21 sc
6: 21 sc
7: 4 sс, (deс, 1 sс) x 3, 8 sc (18)
8: 5 sc, 3 dеc, 7 sc (15)
9: 6 sс, 1 dec, 7 sс (14)
10: 14 sс
11: 14 sc
12: 3 sс, 1 іnc, 6 sc, inс, 3 sc (16)
13: 16 sс + 4 sc (20)


Оn thе fіrst leg, fastеn the thread, cut it off. On thе sеcοnd lеg, row 13: 16 sbn + 12 sbn, dо nοt сut the thread, then knіt 5 ch and connеct the legs.

Torso

1: 16 sb οn 1 lеg, 5 sb (аlong thе сhаіn оf сh), 8 sb on the second leg (42) frоm thе sеcοnd row wе mаke υnіform еdіts, thе loсаtіоn оf the edіts іs mаrkеd on thе dіagrаm
2: 2 sb, іnc, 5 sb, inc, 3 sb, inc, 5 sb, іnc, 4 sb, іnc, 5 sb, іnc, 3 sb, іnc, 5 sb, іnс, 2 sb (50)
3-12: 50 sb (10 rows)
Тhe beginnіng of the row іs eхасtlу on the sіde, іf shіftеd, knіt 1-2 sс. We stuff the lеgs аnd thеn іn thе рrοcess of knіtting.
13: (23 sc, dеc) х 2 (48)
14-15: 48 sс (48)
16: (10 sc, dec) x 4 (44)
17-19: 44 sc (44)
20: (9 sc, deс) х 4 (40)
21-23: 40 sс (40)
24: (8 sс, dеc) x 4 (36)
25-26:36 sc (36)
27: (7 sc, dеc) x 4 (32)

Up hаts
Rеd уarn:

1: 6 sс in КА
2: (рr) (12)
3: (1 sс, inc) x 6 (18)
4: 18 sc
5: (2 sc, іnс) x 6 (24)
6: (3 sc, іnс ) х 6 (30)
7: 30 sc
8: (4 sс, inс) х 6 (36)
9: (5 sc, іnс) x 6 (42)
10: (6 sc, іnc) х 6 (48)
11: 48 sc
12: (7 sс, іnc) x 6 (54)
13: (8 sс, inс) х 6 (60)
14: (9 sс, inc) х 6 (66)
15: 66 sс
16: ( 10 sc, іnс) х 6 (72)
17: (11 sс, іnc) x 6 (78)
18: (12 sс, іnc) х 6 (84)
19:84 sс
20: (13 sс, inc) x 6 (90)
21: 90 sс

Нat bоttоm
Whitе yarn:1: 5 sс in CA
2: (pr) (10)
3: (1 sc, inc) x 5 (15)
4: (2 sc, inc) х 5 (20)
5: (3 sc, іnс) х 5 (25)
6: (4 sс, inc) х 5 (30)
7: (5 sс, іnc) х 5 (35)
8: (6 sc, іnc) х 5 (40)
9: (7 sс, inc) х 5 (45)
10: (8 sc, inc) x 5 (50)
11: (9 sс, іnс) х 5 (55)
12: (10 sc, inс) х 5 (60)
13: (11 sс, inc, іnc) х 5 (65)
14: (12 sc, іnс) x 5 (70)
15: (13 sс, іnc) х 5 (75)
16: (14 sс, inc) x 5 (80)
17: (15 sc, іnc) x 5 (85) red уarn

Hаndlеs (2 pаrts)
1: 6 sс in KΑ
2: (рr) (12)
3: (10 sc, deс) (11)
4: (9 sс, deс) (10)
5-13: 10 sс + 2 sc, соnneсt both pаrts 4 sbn, sеw hands in thе 7th row frοm abоvе

Largе spоts (2 раrts)
1: 6 sс іn CA
2: (sp) х 6 (12)
3: (1 sc, sс) х 6 (18)

Spots mеdium (2 рarts)
1: 6 sс in СA
2: (pr) х 6 (12)

Smаll spots (4 pаrts)
1: 7 sc іn КΑ

Amigurumi Cow Making and models

0

I would like to tell you about a very cute amigurumi knitting toy models. A very popular model. Amigurimi cow annotated model.

Dragon Pattern

0

Fierce or Sleepy Dragon Pattern Part One of Three

When I first designed this dragon I made two, a green one and a red one but they remained faceless for a couple days while I thought about what I wanted the face to look like. I was taking photos of them when my youngest son came in. He played with them for a bit and then said,

“This green one should be a good and friendly dragon and this red one should be a fierce but good dragon. They should be named Dreams and Nightmare”
I just love those names so much! A light bulb went off in my head just then. I decided on two different looks for their faces. You will see instructions for the head that will give you either the sleepy head or the fierce head look. You decide what look you want your dragon to have. Dreams looks a little sleepy so I refer to “sleepy” or “fierce” in the instructions below.
Size: Dragon is 16 -18 inches tall. Please see the supplies list below for the amount of yarn needed.

How To Print This Pattern:
This is quite a long pattern. You can print it off by using a free service  here.

There are 3 parts to this pattern:
Part One ~ Written pattern scroll down this page
Part Two ~ Stuffing and shaping with photos here
Part Three ~ Assembly of Dragon here

This is a free pattern for all to enjoy. If you would like to leave a donation please do so by using the donation button also located at the bottom of this pattern. Donations of any size are greatly appreciated and do help me to keep on providing free patterns.
Thank you so much and enjoy!

Supplies:
2 rolls of Red Heart Super Saver yarn OR 1 jumbo roll of Red Heart Comfort yarn in any color for the head, body, tail, limbs, outer wings and head parts
a small amount of yarn in an alternate color for the inner wings and spikes
a very small amount for the eyeballs
4.5mm hook if you crochet loose and see gaps then try a smaller hook
blunt end yarn needle for sewing
scissors
polyester stuffing
depending on type of eye you make, a small button, safety eye, felt or scrap piece of yarn for the pupil
4 pipe cleaners (preferably a similar color as the outer wing)

Abbreviations:

st = stitch
sc = single crochet
sl st = slip stitch
hdc = half double crochet
dc = double crochet
2tog = crochet 2 stitches together
FLO = front loops only
f/o = finish off

*Please read the introduction at the top of this page which explains why there are 2 different instructions for the eyes and mouth. Look at the top for sizing, supplies needed and other important notes. There are videos that go through each section of the dragon if you need that extra help. There is also a page with photos and written instructions for each part if you prefer that to a video. See here.

VIDEO TUTORIAL FOR THE BODY IS HERE

Many of the rows of the body are worked in both hdc and sc, this is done for shaping. The areas with hdc’s are more relaxed. When you stuff the dragon be sure to shape as you stuff. Refer to the videos and photos (link to those at bottom of this pattern) to help you get a better idea how the shape is supposed to look. Do not worry if you see stuffing showing through the stitches on the front side of the dragon as you will be sewing a tummy patch over this entire area.
There videos for each part of the dragon, I’ve including some links right in the parts themselves, There is also a written instruction page with photos if you prefer that to a video. See here.Starting at the bottom of the body working up to the neck.

BODY:
1) magic circle with 6sc (6)
2) 2hdc in each (12) add a marker in last st of this row and move marker at the end of
each row
3) 2hdc in each st (24)
4) 1hdc then 2hdc in the next st, repeat to marker (36)
5) 1hdc in the next 5st then 2hdc in the next st, repeat to marker (42)
6) 1hdc in the next 6st then 2hdc in the next st, repeat to marker (48)
7) 1hdc in the next 7st then 2hdc in the next st, repeat to marker (54)
8) 1hdc in the next 27st then 1sc in the next 27st (54)
9-15) repeat row 8 for 7 rows
16) 1sc in the next 3st then 1hdc next 21st then 1sc in the next 30st (54)
17) 1sc in the next 4st then 1hdc in the next 18st then repeat this next sequence, (1sc in next 6st then sc2tog), to the marker. When you land on the marker you should be crocheting 2st together (50)
18) 1sc in the next 8st then 2tog, repeat to marker (45)
19) 1sc in the next 5st then 1hdc in the next 15st then 1sc in next 25st (45)
20) 1sc in the next 3st then 2tog, repeat sequence 5 times. Then 1sc in next 20st (40)
21) 1sc in the next 8st then 2tog, repeat to marker (36)
22) 1sc in the next 6st then 1hdc in next 12st, 1sc in next 18st (36)
23) repeat row 22
24) 1sc in the next 4st then 2tog, repeat to marker (30)
25) 1sc in each st for 1 row
stuff body, shape as you stuff
26) 1sc in the next 8st then 1hdc in next 10st, 1sc in next 12st (30)
27-29) repeat row 26 for 3 rows
30) 1sc in the next 3st then 2tog, repeat to marker (24)
31) 1sc in each st for 1 row
32) 1sc in the next 4st then 2tog, repeat to marker (20)
33) 1sc in the next 6st then 1hdc in next 8st then 1sc in next 6st (20)
34) 1hdc in the next 6st then 1sc in next 8st then 1hdc in next 6st (20)
35) repeat row 34
36) 1hdc in the next 6st then 1sc in next 2st then sc2tog then sc2tog then 1sc in next 4st, then 1hdc in next 4st (18)
37) 1hdc in the next 7st then 1sc in next 8st, 1hdc in next 3st (18)
stuff more, shape as you stuff
38) 2hdc in the next 5st then 1hdc in next 2st, then 1sc in next 2st then sc2tog then 1sc in next 7st (22)
39) 1hdc in the next 13st then 1sc in next 2st then sc2tog, sc2tog, then 1sc in next 3st (20)
40) 1hdc in the next 10st then 1sc in next 10st (20)
41-42) repeat row 40 for 2 rows
43) 1sc in next 8st then 2tog, repeat to marker (18)
stuff and shape as you stuff
44-47) 1sc in each st for 4 rows
48) 1sc in next 4st then 2tog, repeat to marker (15)
49) 1sc in each st for 1 row
50) 1sc in next 3st then 2tog, repeat to marker (12)
sl st next st and f/o leaving a tail for sewing. Stuff firmly so that when you sew the head in place the neck does not flop over or wrinkle. You can use wire, just be sure to loop and tape the ends of the wire so they never poke through. I used wire in one of my dragons and no wire for the others. There is no real difference except I can pose the one head a bit more than the others.

Head: for this part and the rest of the dragon parts, the sequences given are to be repeated to the marker. Make sure to use a marker and move the marker at the end of every row . Video here
1) magic circle with 6sc (6)
2) 2sc in each st (12)
3) 1sc then 2sc in next st (18)
4) 1sc in next 2st then 2sc in next st (24)
5) 1sc in next 3st then 2sc in next st (30)
6) 1sc in next 4st then 2sc in next st (36)
7-11) 1sc in each st for 5 rows
12) 1sc in next 4st then 2tog (30)
13) 1sc in each st for 1 row
14) 1sc in next 3st then 2tog (24)
15-18) 1sc in each st for 4 rows
19) 1sc in next 2st then 2tog (18)
20-21) 1sc in each st for 2 rows
22) 2sc in next 6 FLO then 2sc in next 12st (36)
23) 1hdc in next 12 FLO then 1sc in next 24st (36)
24) 1hdc in next 12st then repeat this sequence, 1sc in next 4st then 2tog, to the marker (32)
25) 1hdc in next 12st then 1sc in next 20st (32)
stuff snout, shape as you stuff
26-27) repeat row 25 for 2 rows
28) 1sc in each st for 1 row
29) 1sc in next 6st then 2tog (28)
30) 1sc in next 5st then 2tog (24)
31) 1sc in next 2st then 2tog (18)
stuff head. The hdc’s are the top of the head and you should be stuffing and shape accordingly. Please view the photos OR video if unsure how to properly stuff and shape.
32) 1sc then 2tog (12)
sl st next st and f/o leaving a tail for sewing. Weave in and out of the FLO of the stitches.
stuff more and shape as you stuff.
Pull tight and knot off. Hide yarn tail inside head.

Nostrils: Video here
Insert hook in between the 6th and 7th row or 7th and 8th row (depends on how firmly you stuffed, eye it up and choose by what would look better) ch 1 then make 3dc in first space and 3dc in next space, sl st into next space then f/o. There should be at least 4 visible stitch holes between nostrils. Shape the nostrils and sew the yarn tails into the head.

Ears: work starting yarn tail into 2nd or 3rd row. Video here
1) magic circle  with 6sc (6)
2) 2sc in each (12)
3) 1sc then 2sc in next st (18)
4) 1sc in next 2st then 2sc in next st (24)
sl st next st and f/o leaving a tail for sewing.
roll and sew the end to hold the shape. One end should be closed and the other end open like a rolled taco. Make sure to roll the 2nd ear in the opposite direction so the ears match when sewn onto the dragon.

Top Eyelid for Fierce but Friendly Dragon Video for all the eye parts here
1) ch8 begin with a long enough starting tail to sew into the head
2) start with 2nd ch from hook, 1sc in each ch (7) ch1 and turn
3) 1sc, 1hdc, 2dc next 3st, 1hdc, sl st last st
f/o leaving a long tail for sewing

Bottom Eyelid for Fierce but Friendly Dragon
1) ch8 begin with a long enough starting tail to sew into the head
2) start with 2nd ch from hook, 1sc, 1hdc next 5st, sl st last st (7)
f/o leaving a long tail for sewing

Eyeball for Fierce but Friendly Dragon
1) magic circle  with 6sc (6)
2) 2sc in each (12)
3) 1sc in each st for 1 row
sl st next st and f/o. Cut yarn tail shorter and tuck behind eye when ready to sew to the head. Use colored yarn whip stitch on a pupil, play around with it. I did one with colored yarn then black in the middle, it looks pretty cool that way.

Top Eyelid for Sleepy Looking Dragon
1) ch8 begin with a long enough starting tail to sew into the head
2) start with 2nd ch from hook, 1sc then 1dc next 5st then sl st last st
f/o leaving a long tail for sewing

Bottom Eyelid for Sleepy Looking Dragon
1) ch6
f/o leaving a long tail for sewing

Eyeball for Sleepy Looking Dragon
1) magic circle with 6sc (6)
sl st next st and f/o. Cut yarn tail shorter and tuck behind eye when ready to sew to the head. Sew a solid button onto the circle.
You can glue this whole piece to the head or sew it to the head

Mouth for Both Dragons Video here
1) magic circle with 6sc (6)
2) 2sc in each (12)
3) 1sc then 2sc in next st (18)
4) 1sc in next 2st then 2sc in next st (24)
for rows 5-8 start in 2nd st from hook
5) 1sc in next 5st then ch1 and turn
6) 1sc in next 5st then ch1 and tun
7) 1sc in next 5st then ch1 and turn
8) 1sc in next 5st then ch1 and turn
9) 1sc in next 5st then (for Sleepy Dragon f/o here leaving a long tail for sewing) for Fierce Dragon continue on: ch1 and continue down the edge, 1sc in next 5 spaces. Once you reach the rounded part of the mouth, ch1 then 1sc in same stitch, ch1 then 1sc in next stitch, repeat all the way around until you reach the corner of the straight edge, 1sc in next 5 spaces, f/o leaving a long tail for sewing.

Arms: Video here
1) magic circle with 6sc (6)
2) 1sc in next 2st then 2sc in next st (8)
3) 1sc in next 3st then 2sc in next st (10)
4-16) 1sc in each st for 13 rows
17) 2sc in each st (20)
18) make 4 fingers

Legs: video here
1) magic circle with 6sc (6)
2) 2sc in each (12)
3) 1sc then 2sc in next st (18)
4) 1sc in next 2st then 2sc in next st (24)
5) 1sc in next 3st then 2sc in next st (30)
6-8) 1sc in each st for 3 rows
9) 1sc in next 2st then 2tog, repeat sequence until there is 6st left to the marker (the stitch holding the marker is included in that count), put 1sc in each of those 6st (24)
10) 1sc then 2tog (16)
11-14) 1sc in each st for 4 rows
sl st next st and f/o leaving a long tail for sewing. Stuff and shape foot, lightly stuff leg

Tail: video here
1) magic circle with 6sc (6)
2-6) 1sc in each st for 5 rows
7) 1sc in next 2st then 2sc in next st (8)
8-10) 1sc in each st for 3 rows
11) 1sc in next 3st then 2sc in next st (10)
12-14) 1sc in each st for 3 rows
15) 1sc in next 4st then 2sc in next st (12)
16-18) 1sc in each st for 3 rows
19) 1sc in next 3st then 2sc in next st (15)
20-22) 1sc in each st for 3 rows
23) 1sc in next 4st then 2sc in next st (18)
24-26) 1sc in each st for 3 rows
27) 1sc in next 2st then 2sc in next st (24)
28-30) 1sc in each st for 3 rows
31) 1sc in next 3st then 2sc in next st (30)
32-34) 1sc in each st for 3 rows
35) 1sc in next 4st then 2sc in next st (36)
36-38) 1sc in each st for 3 rows
39) 1sc in next 5st then 2sc in next st (42)
40-42) 1sc in each st for 3 rows
43) 1sc in next 6st then 2sc in next st (48)
44-46) 1sc in each st for 3 rows
sl st next st and f/o leaving a long tail for sewing
*Instructions for the tail ridge and tail spike are in part two. OR view the video for adding the ridge and spikes here

Tummy Patch: with alternate color. video here
for rows using hdc always ch2 and turn and start with 3rd st from hook,
for rows using sc always ch1 and turn and start with 2nd st from hook,
1) ch21
2) starting with 2nd ch from hook, 1sc in each ch (20)
3-11) 1hdc in each st for 9 rows (20)
12) 1sc in next 3st then 2tog, repeat to marker (16)
13-14) 1hdc in each st for 2 rows
15) 1sc in next 2st then 2tog (12)
16-17) 1hdc in each st for 2 rows
18) 1sc in next 4st then 2tog (10)
19) 1hdc in each st for 1 row
20) 1sc in next 3st then 2tog (8)
21-25) 1hdc in each st for 5 rows
26) 1sc in next 2st then 2tog (6)
27-33) 1hdc in each st for 7 rows
34) 1sc then 2tog (4)
35) 1hdc in each st for 1 row
36) 1sc in each st for 1 row
f/o leaving a long tail for sewing

Wings:
I did not design left or right, you make 2 of each for the outer and inner wing.
More details about the wings is given with photos in part 2 here
Video for making and assembling the wings here

Outer Wing: with body color make 2
1) ch16
2) start in 2nd ch from hook, 1sc in each ch (15) ch2 and turn,
3) start in 3rd st from hook, 1hdc in next 11st, ch3 and turn,
4) start in 4th st from hook, 1hdc in next 9st then sc2tog , ch2 and turn
5) start in 3rd st from hook, 1hdc in next 7st, ch3 and turn,
6) start in 4th st from hook, 1hdc in next 5st then sc2tog
working now along the edge to the left of your last st, you’ll have to push your hook through, 2tog then 2tog then 2tog then 1sc in the outer loop of the corner. Next, working along the outer loops of the row, 1sc in each of the 15 outer loops, ch1 then working in both loops, sc around the edge and to the first inner corner, now you have to push your hook through, continue working with sc. Working along the edge of the wing tips you will have to push through what was the chain of 3 we made, push through single loops of that chain. Work in both loops of stitches when you can and work along the very outer edge of the wing trying your best to maintain the shape. Once you get all the way around, f/o leaving a long tail for sewing.

Inner Wing: with alternate color make 2
1) ch14
2) start in 2nd ch from hook, 1sc in each ch (13) ch2 and turn,
3) start in 3rd st from hook, 1hdc in next 9st, ch3 and turn,
4) start in 4th st from hook, 1hdc in next 7st then sc2tog , ch2 and turn
5) start in 3rd st from hook, 1hdc in next 5st, ch3 and turn,
6) start in 4th st from hook, 1hdc in next 3st then sc2tog
working now along the edge to the left of your last st, you’ll have to push your hook through, 2tog then 2tog then 2tog then 1sc in the outer loop of the corner. Next, working along the outer loops of the row, 1sc in each of the 13 outer loops, ch1 then working in both loops, sc around the edge and to the first inner corner, now you have to push your hook through, continue working with sc. Working along the edges of the wing tip you will have to push through what was the chain of 3 we made, push through loops of that chain. Work in both loops of stitches when you can and work along the very outer edge of the wing trying your best to maintain the shape. Once you get all the way around, f/o. You do not use these yarn tails for sewing, they will get tucked in between the wing pieces.